Device Manuals
Step-by-step enrollment guides for connecting your devices to the team server.
Download the TAK apps
Install the app for your device first, then follow the matching guide below.
QR enrollment
iTAK QR Enrollment
Connect your iPhone or iPad to the team server by scanning the QR code shown in the portal.
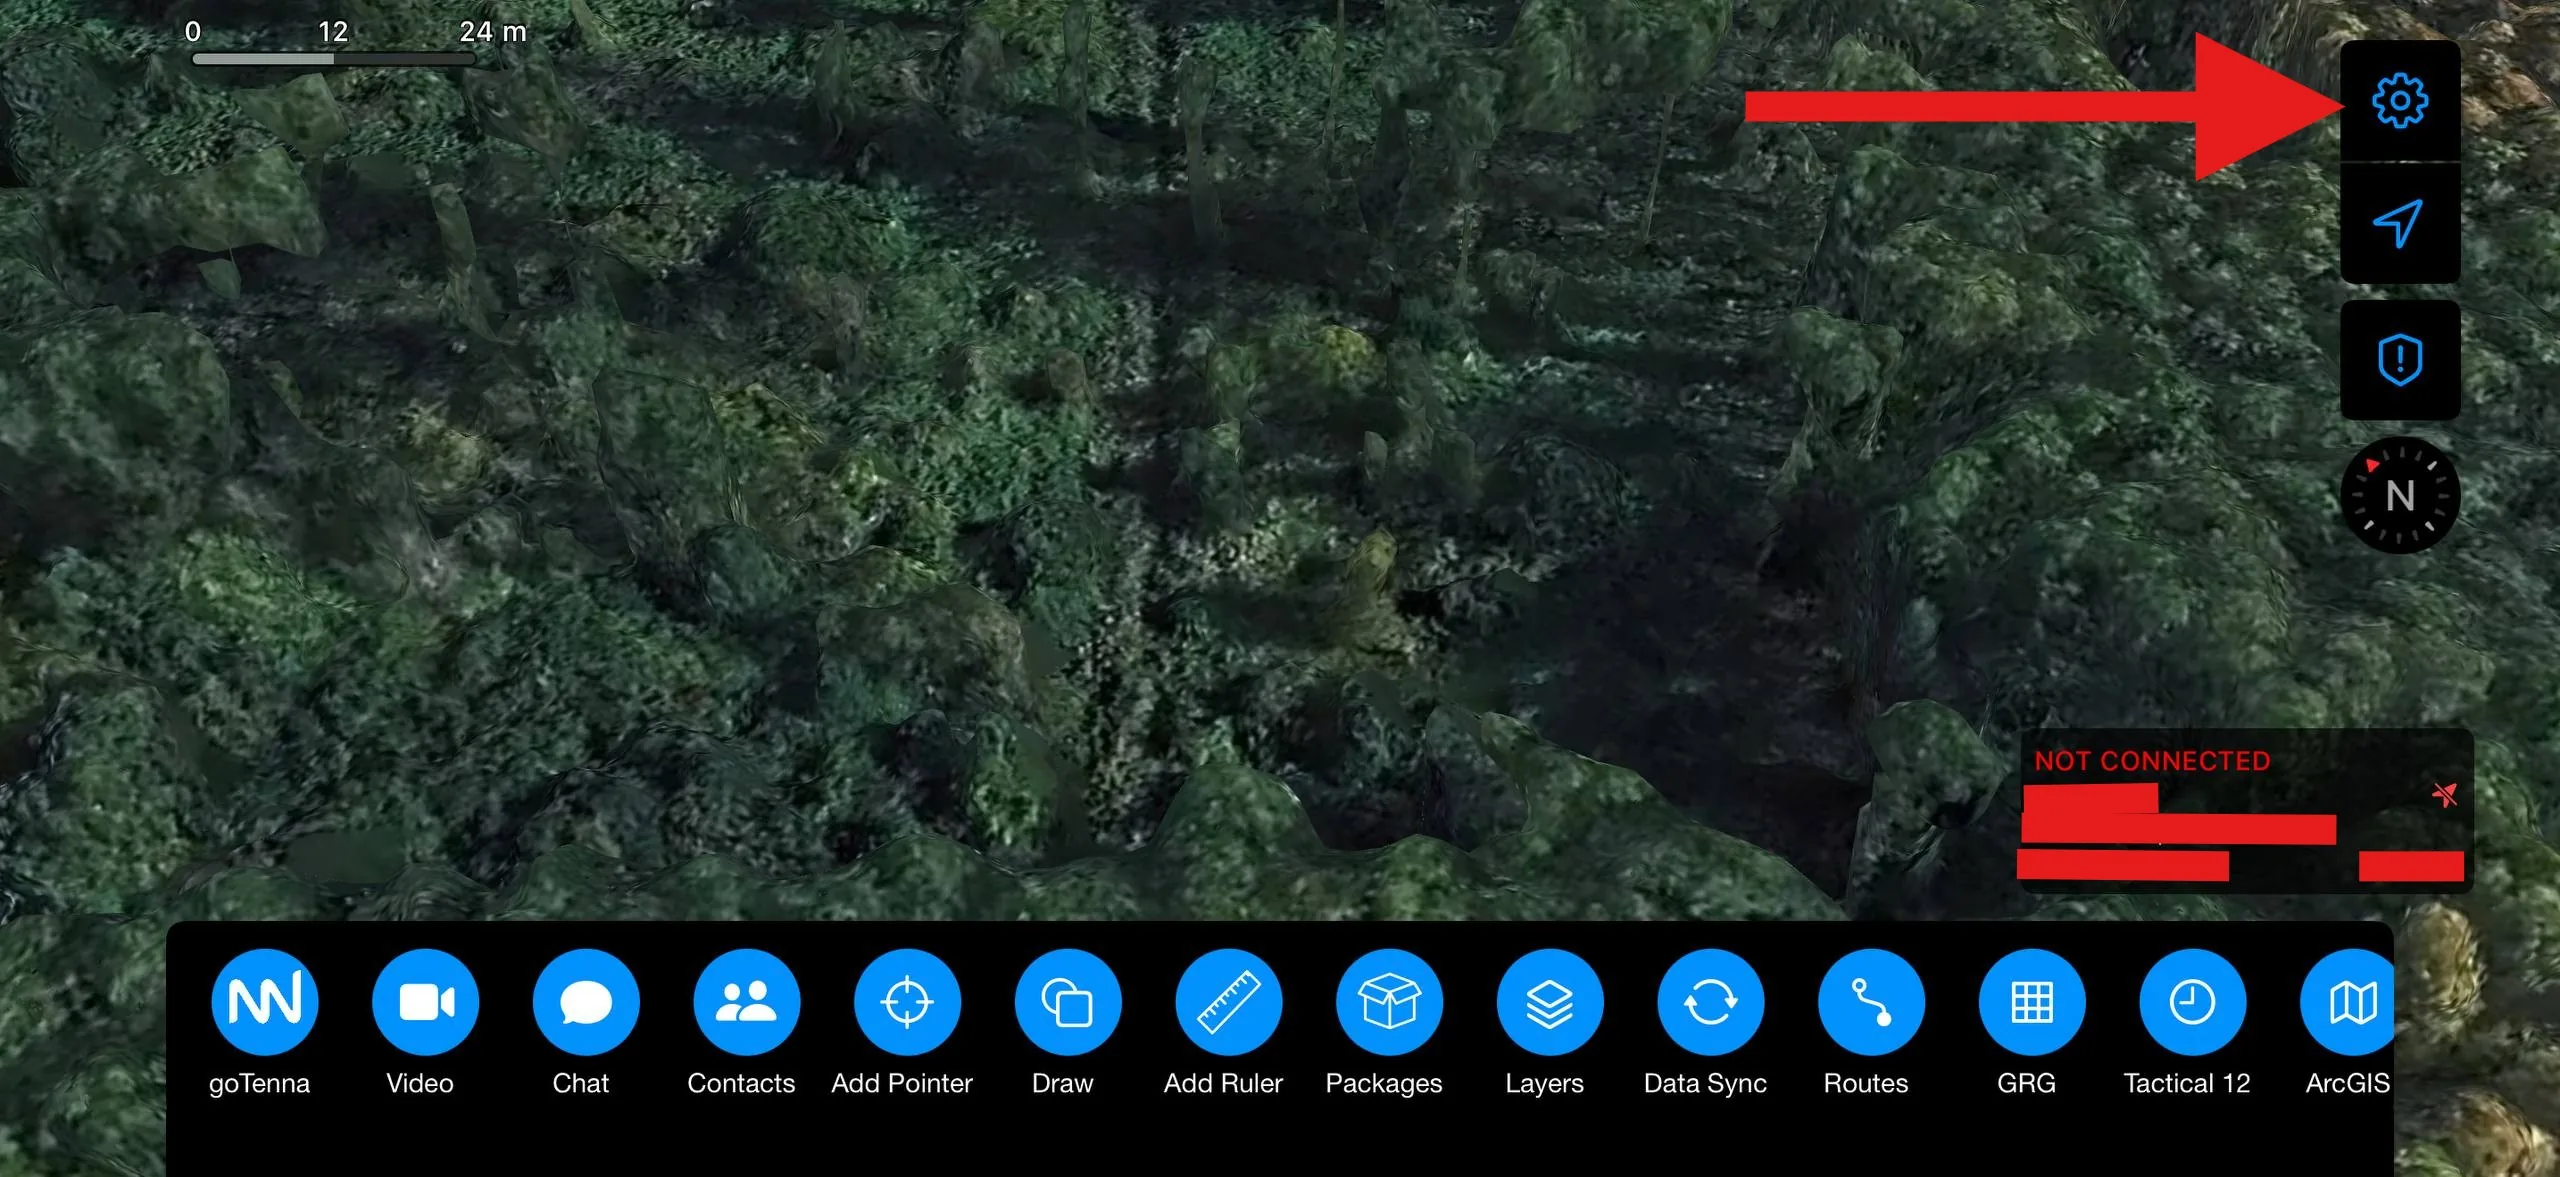
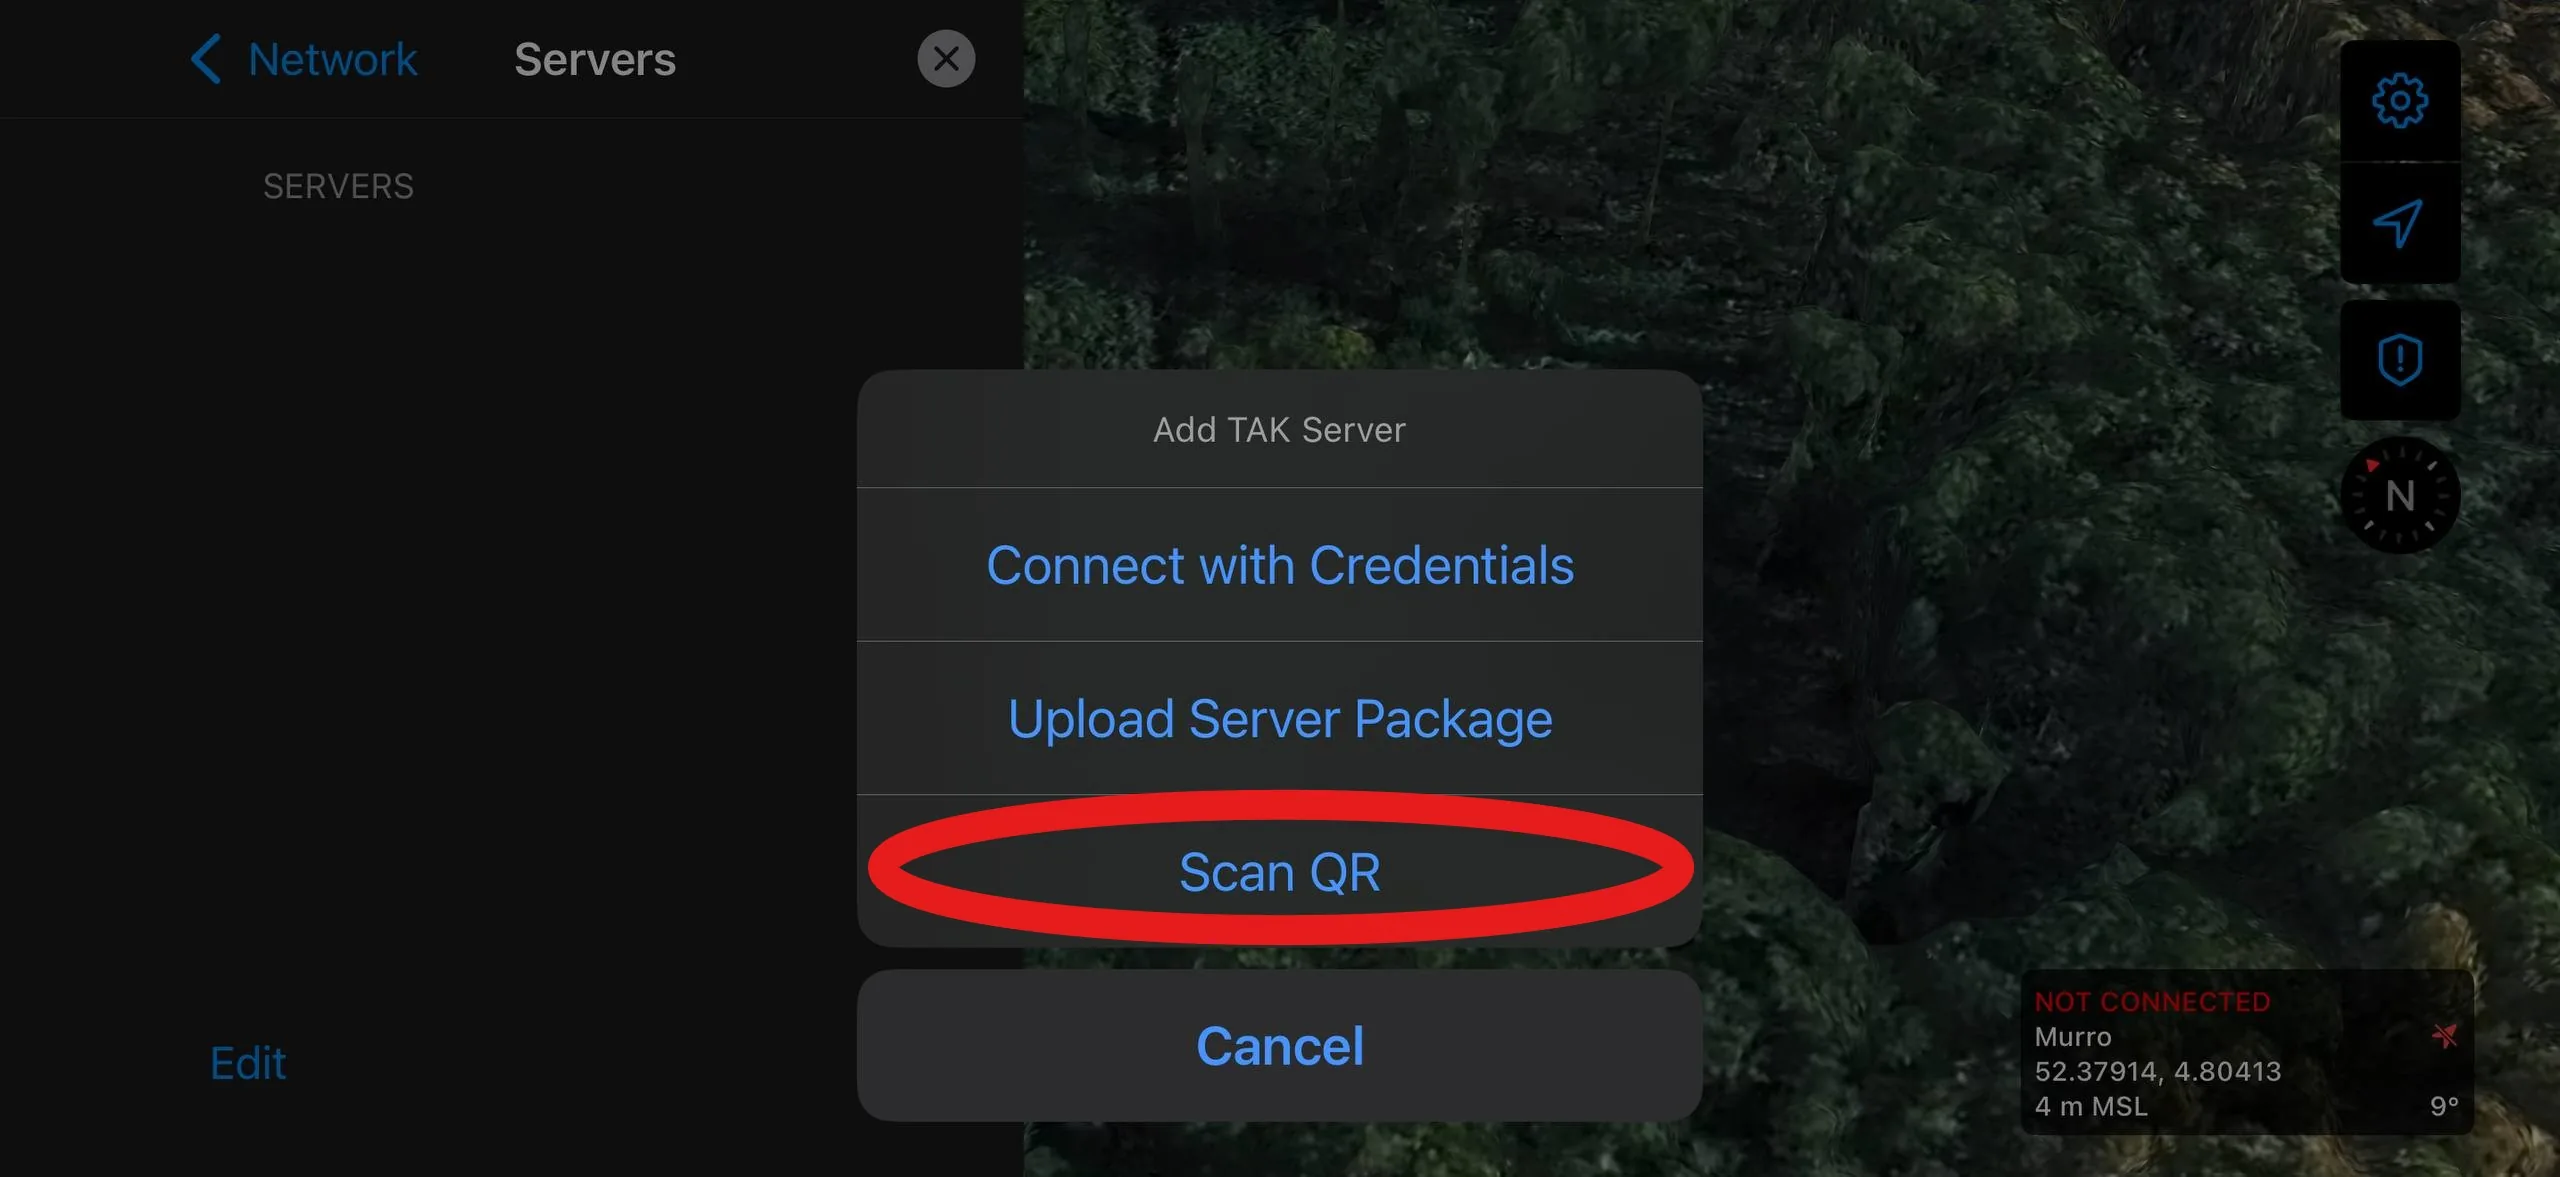
Open iTAK and tap the settings gear in the top-right corner.
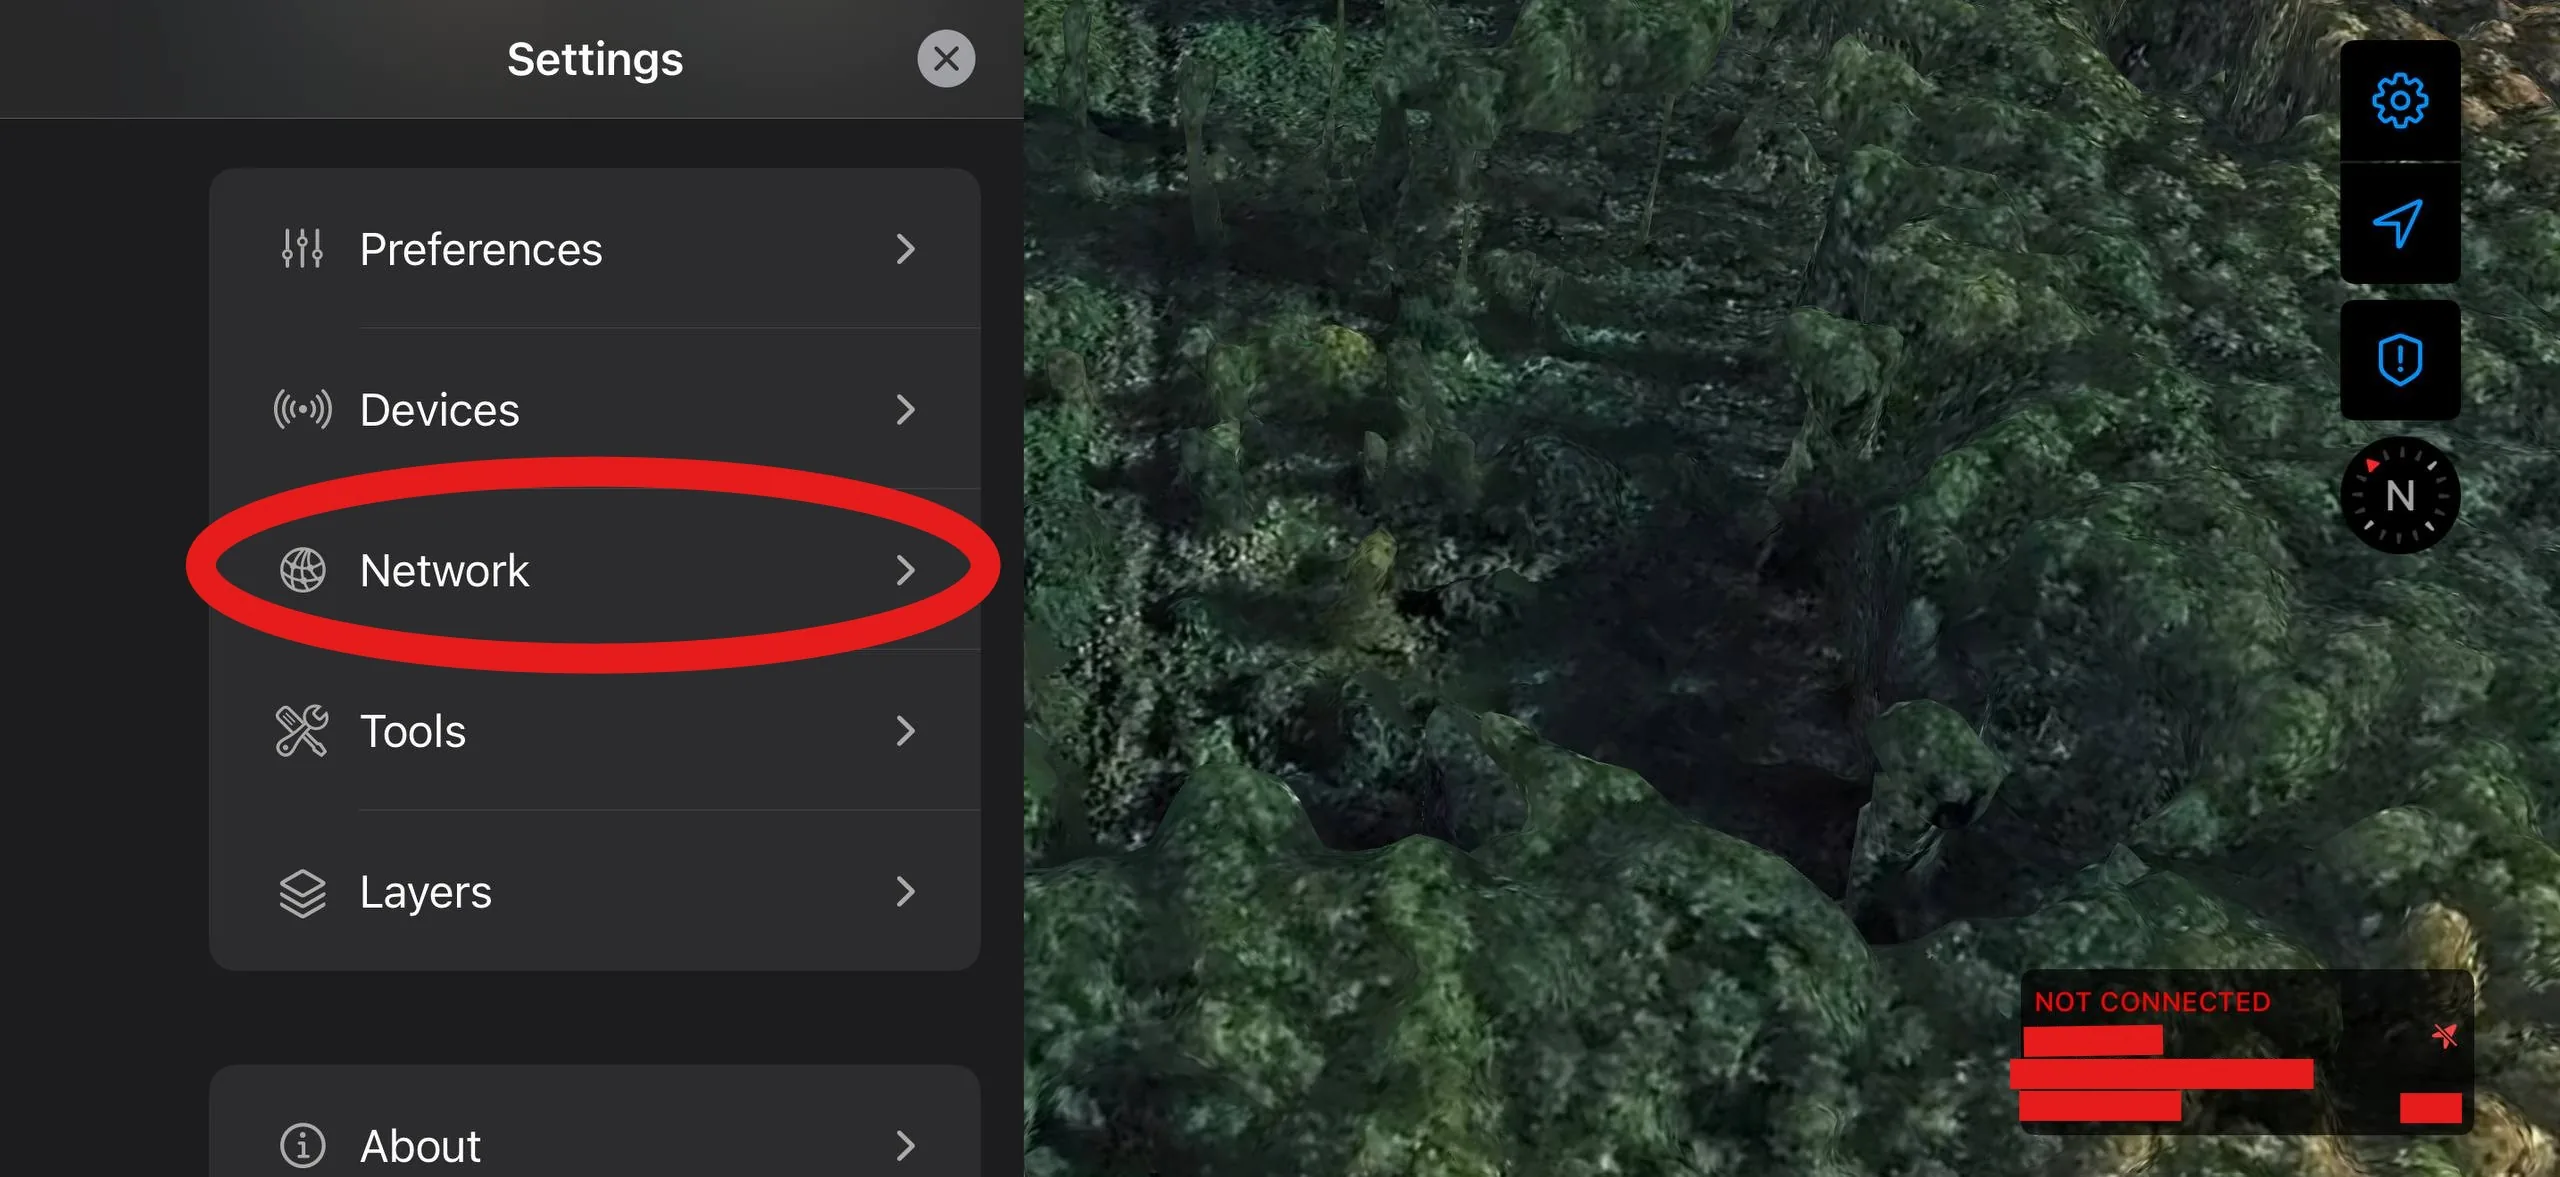
Select Network.
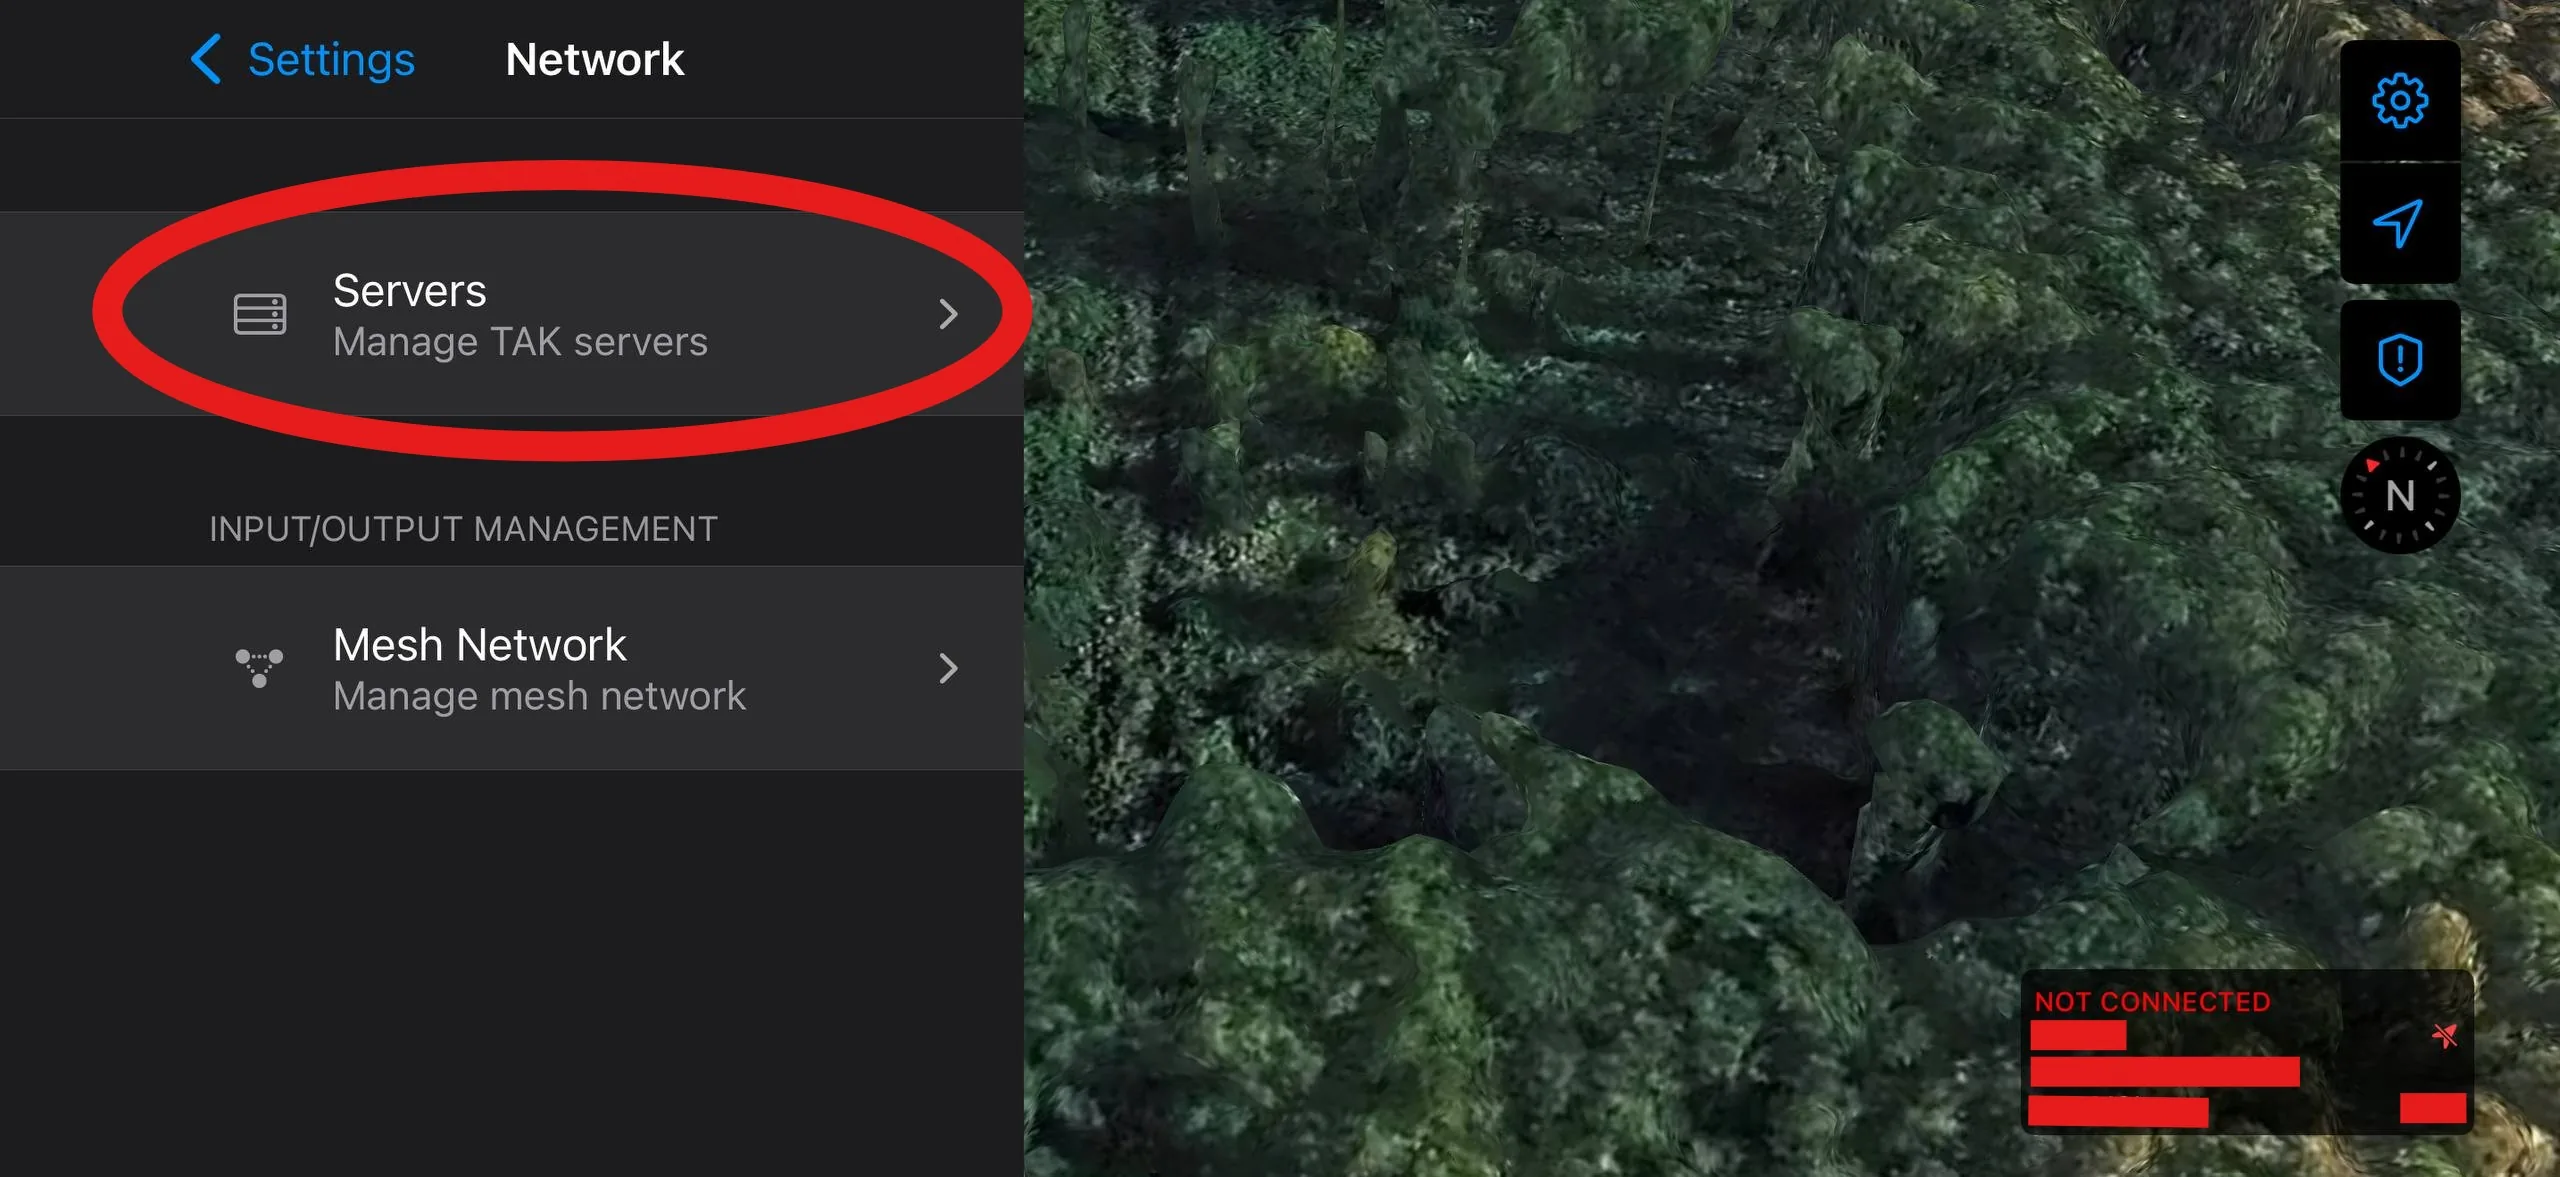
Select Servers.
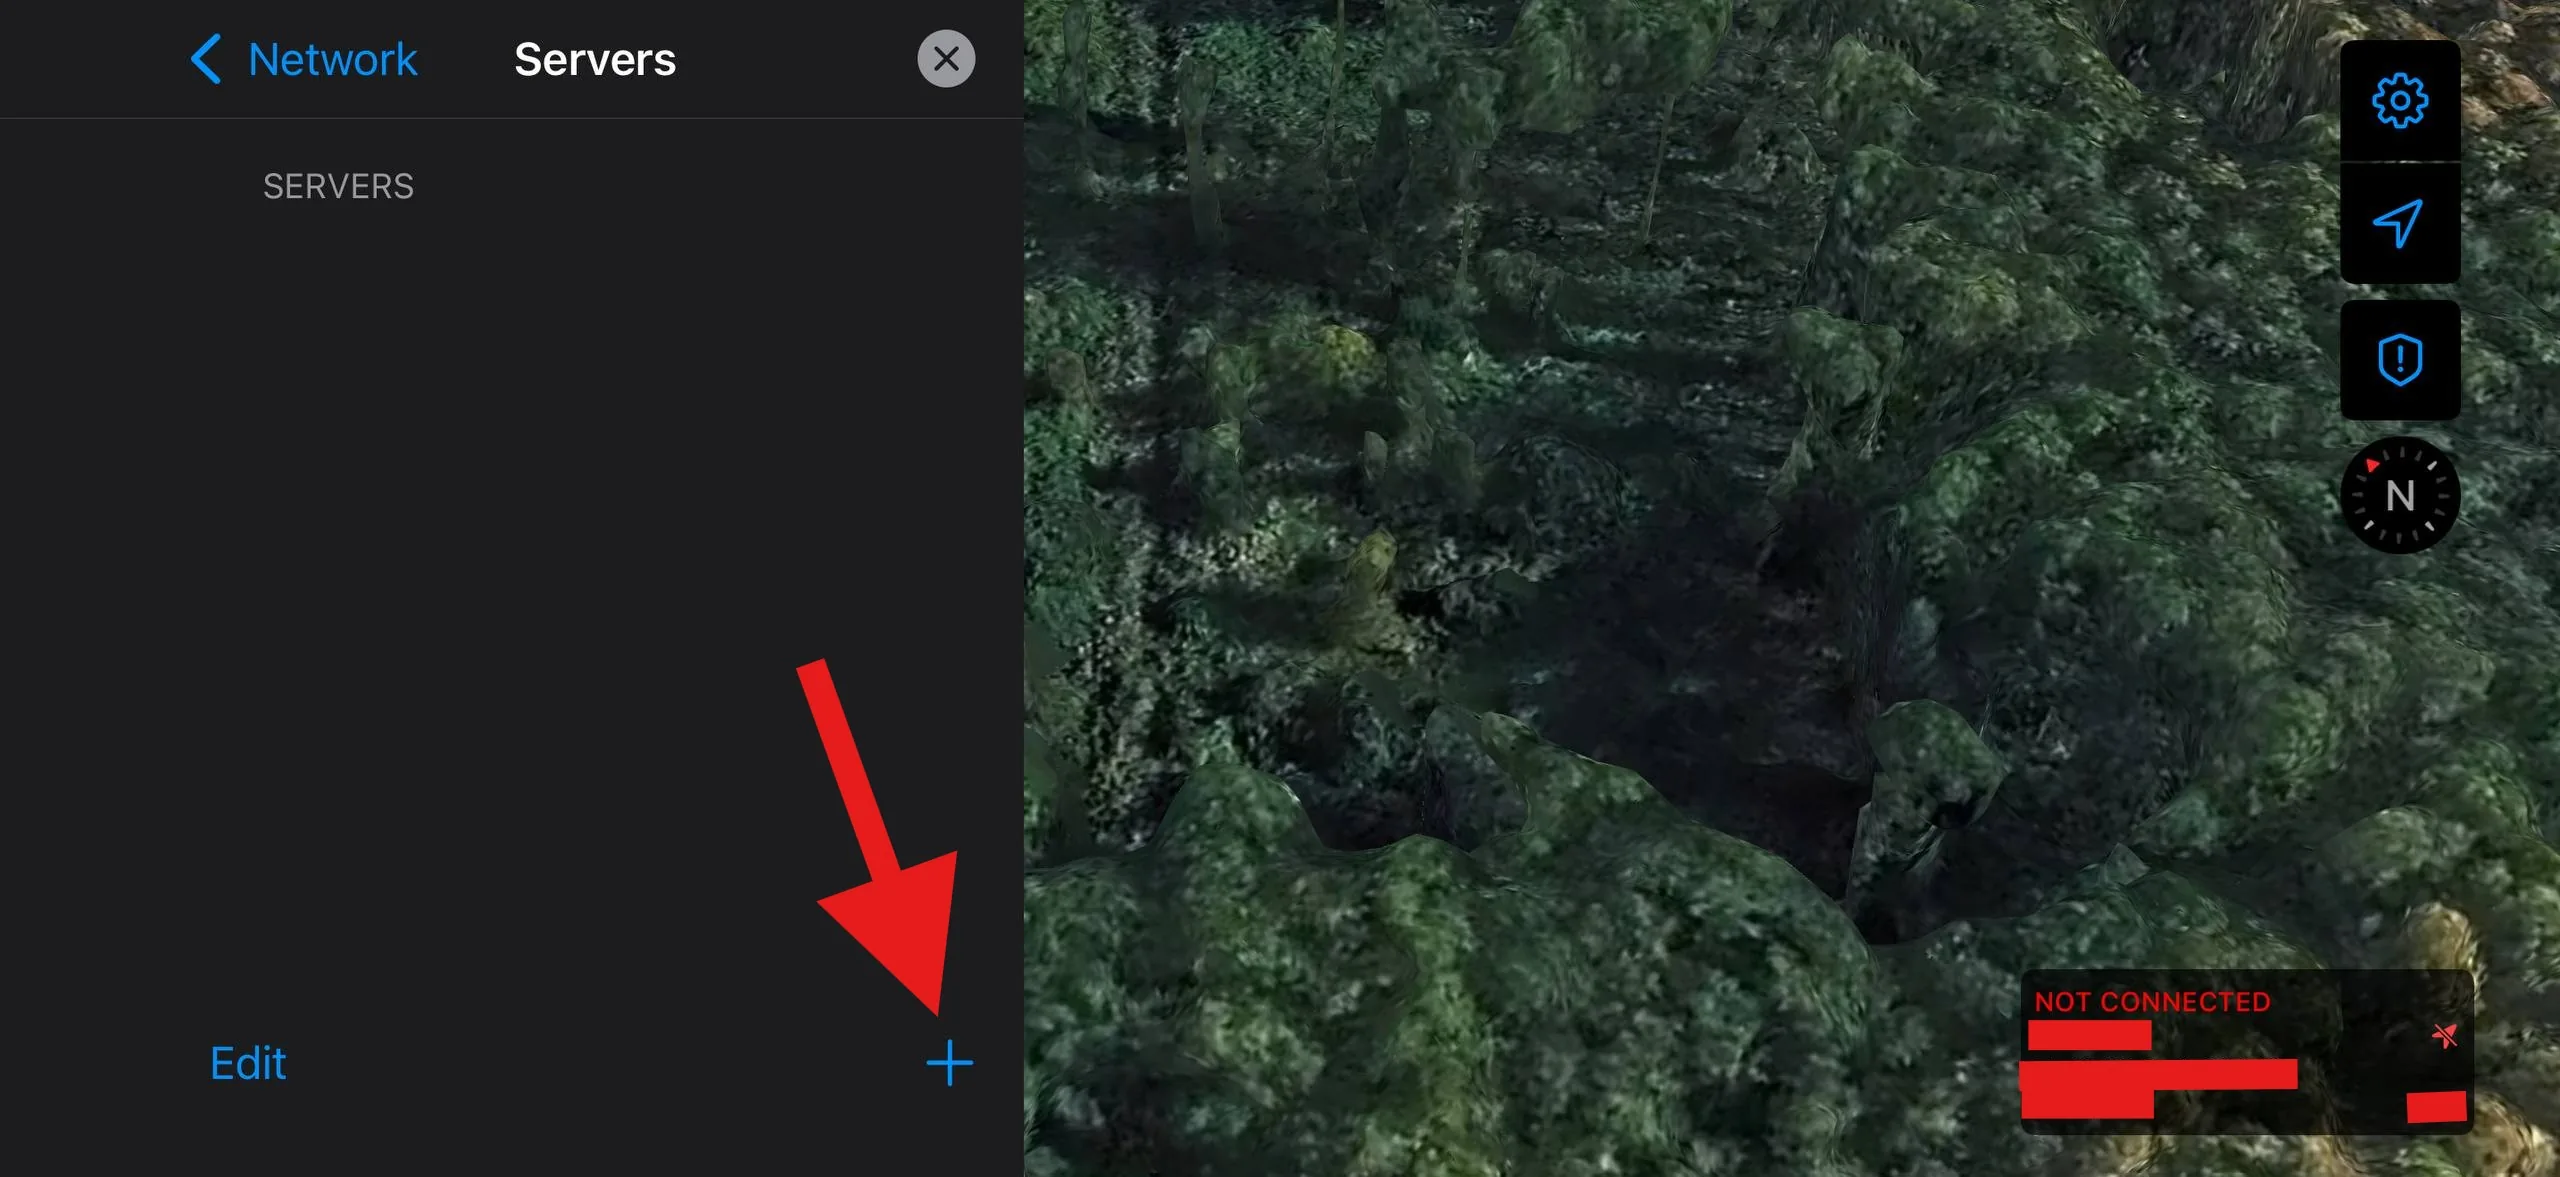
Tap the + button to add a new server.
Select "Scan QR" and scan the iTAK QR code shown in the portal.
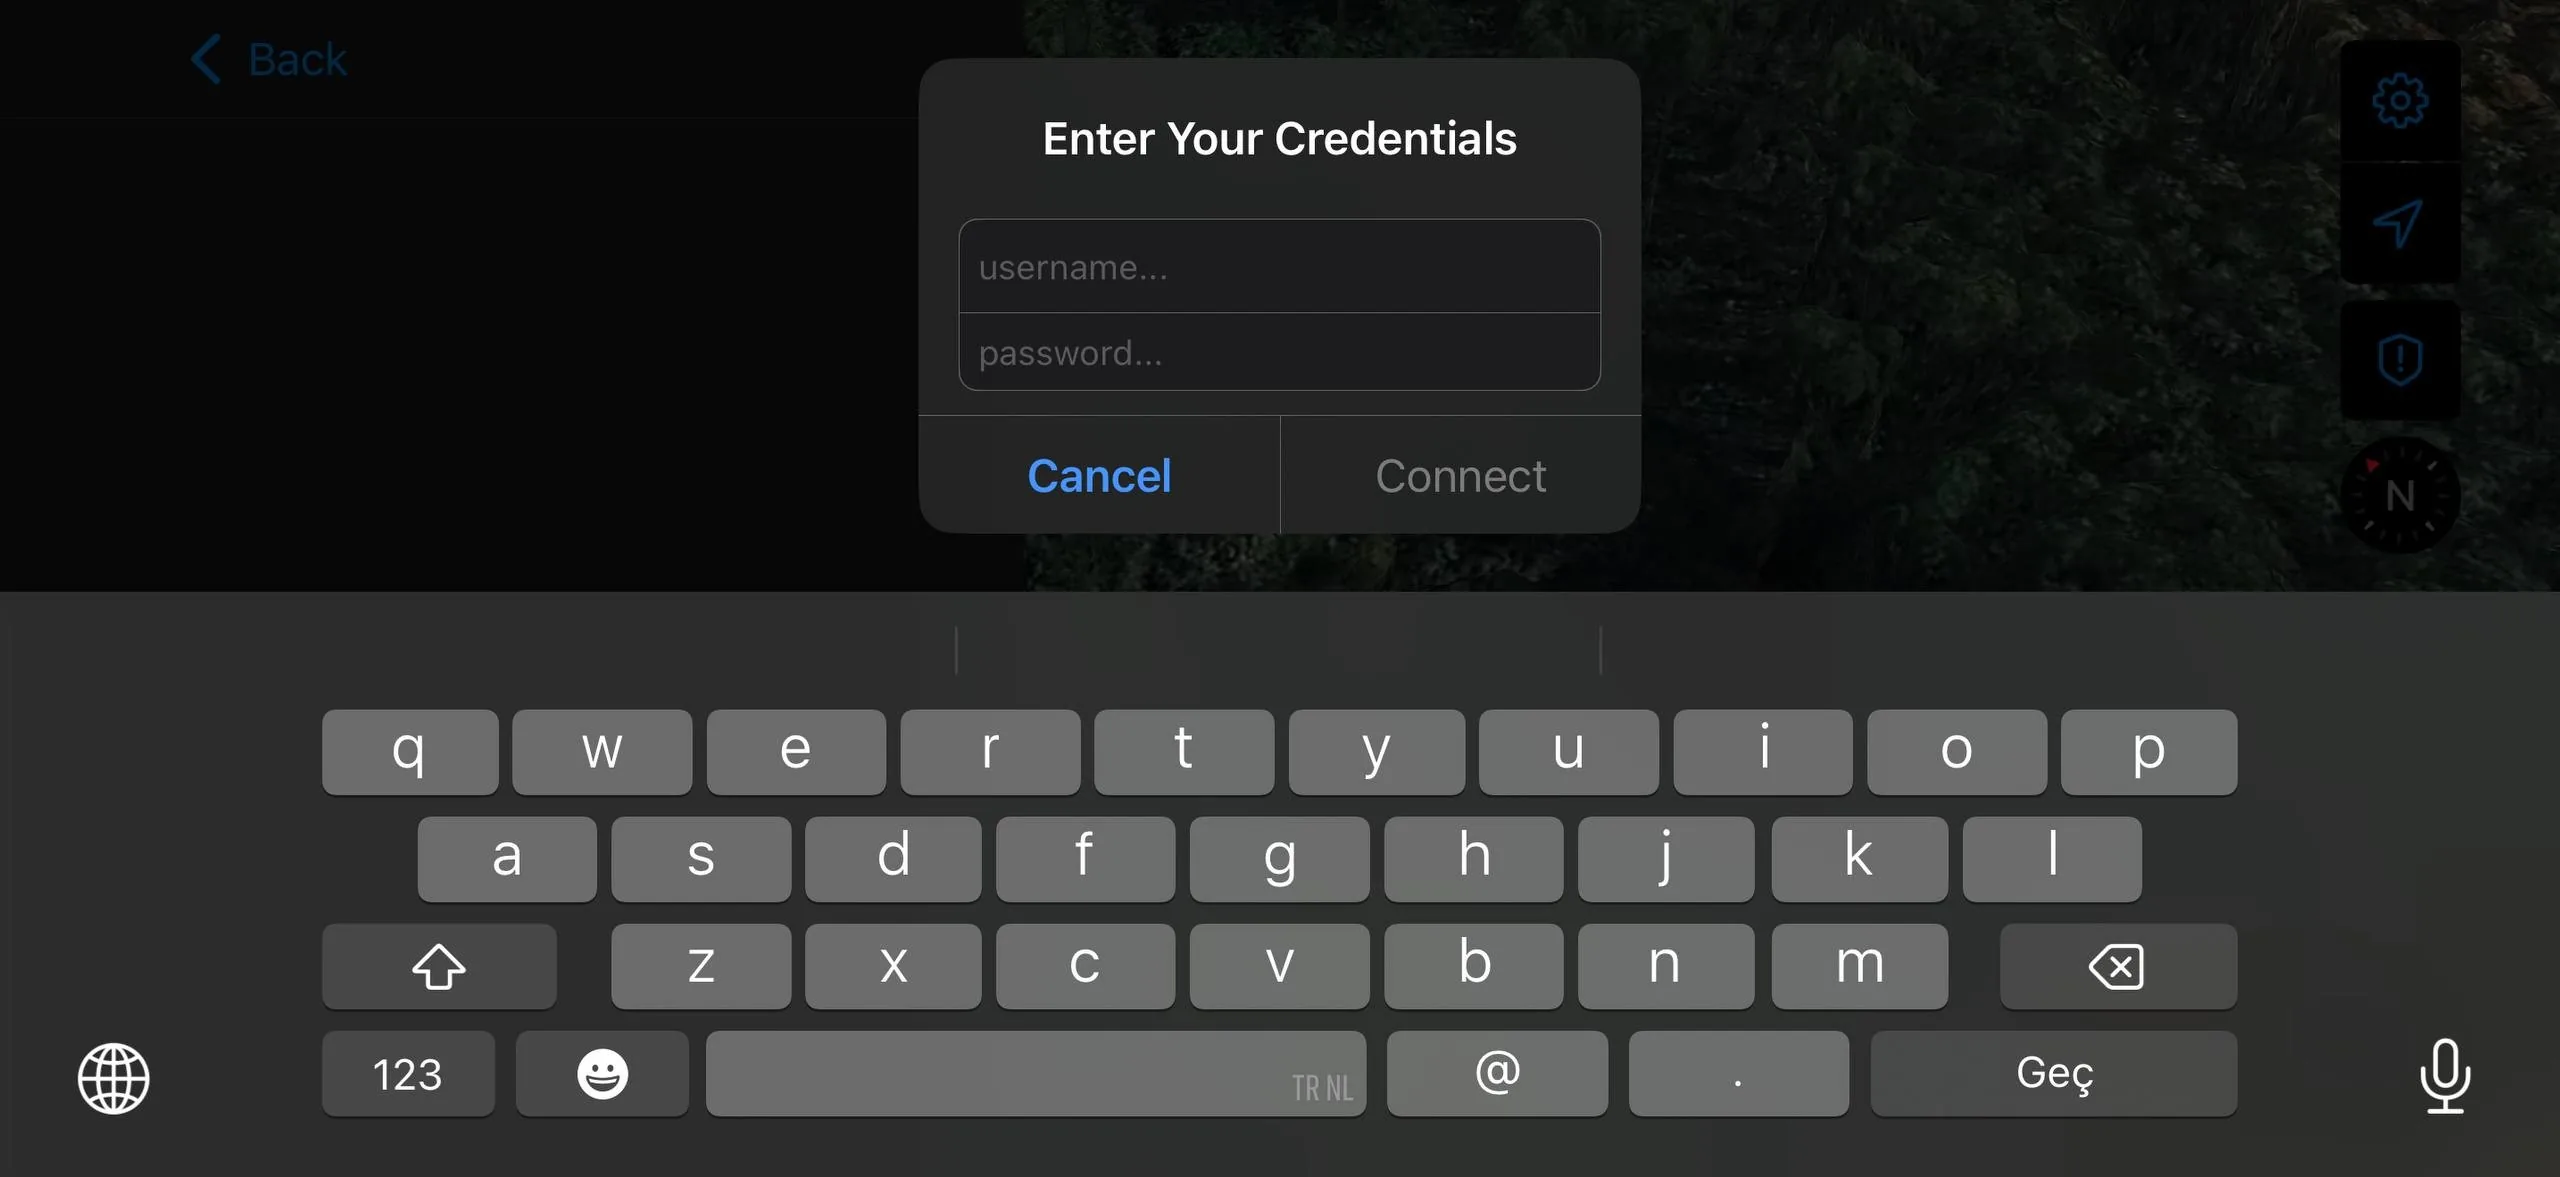
When prompted, enter the username and password shown under Manual login in the portal and tap Connect.
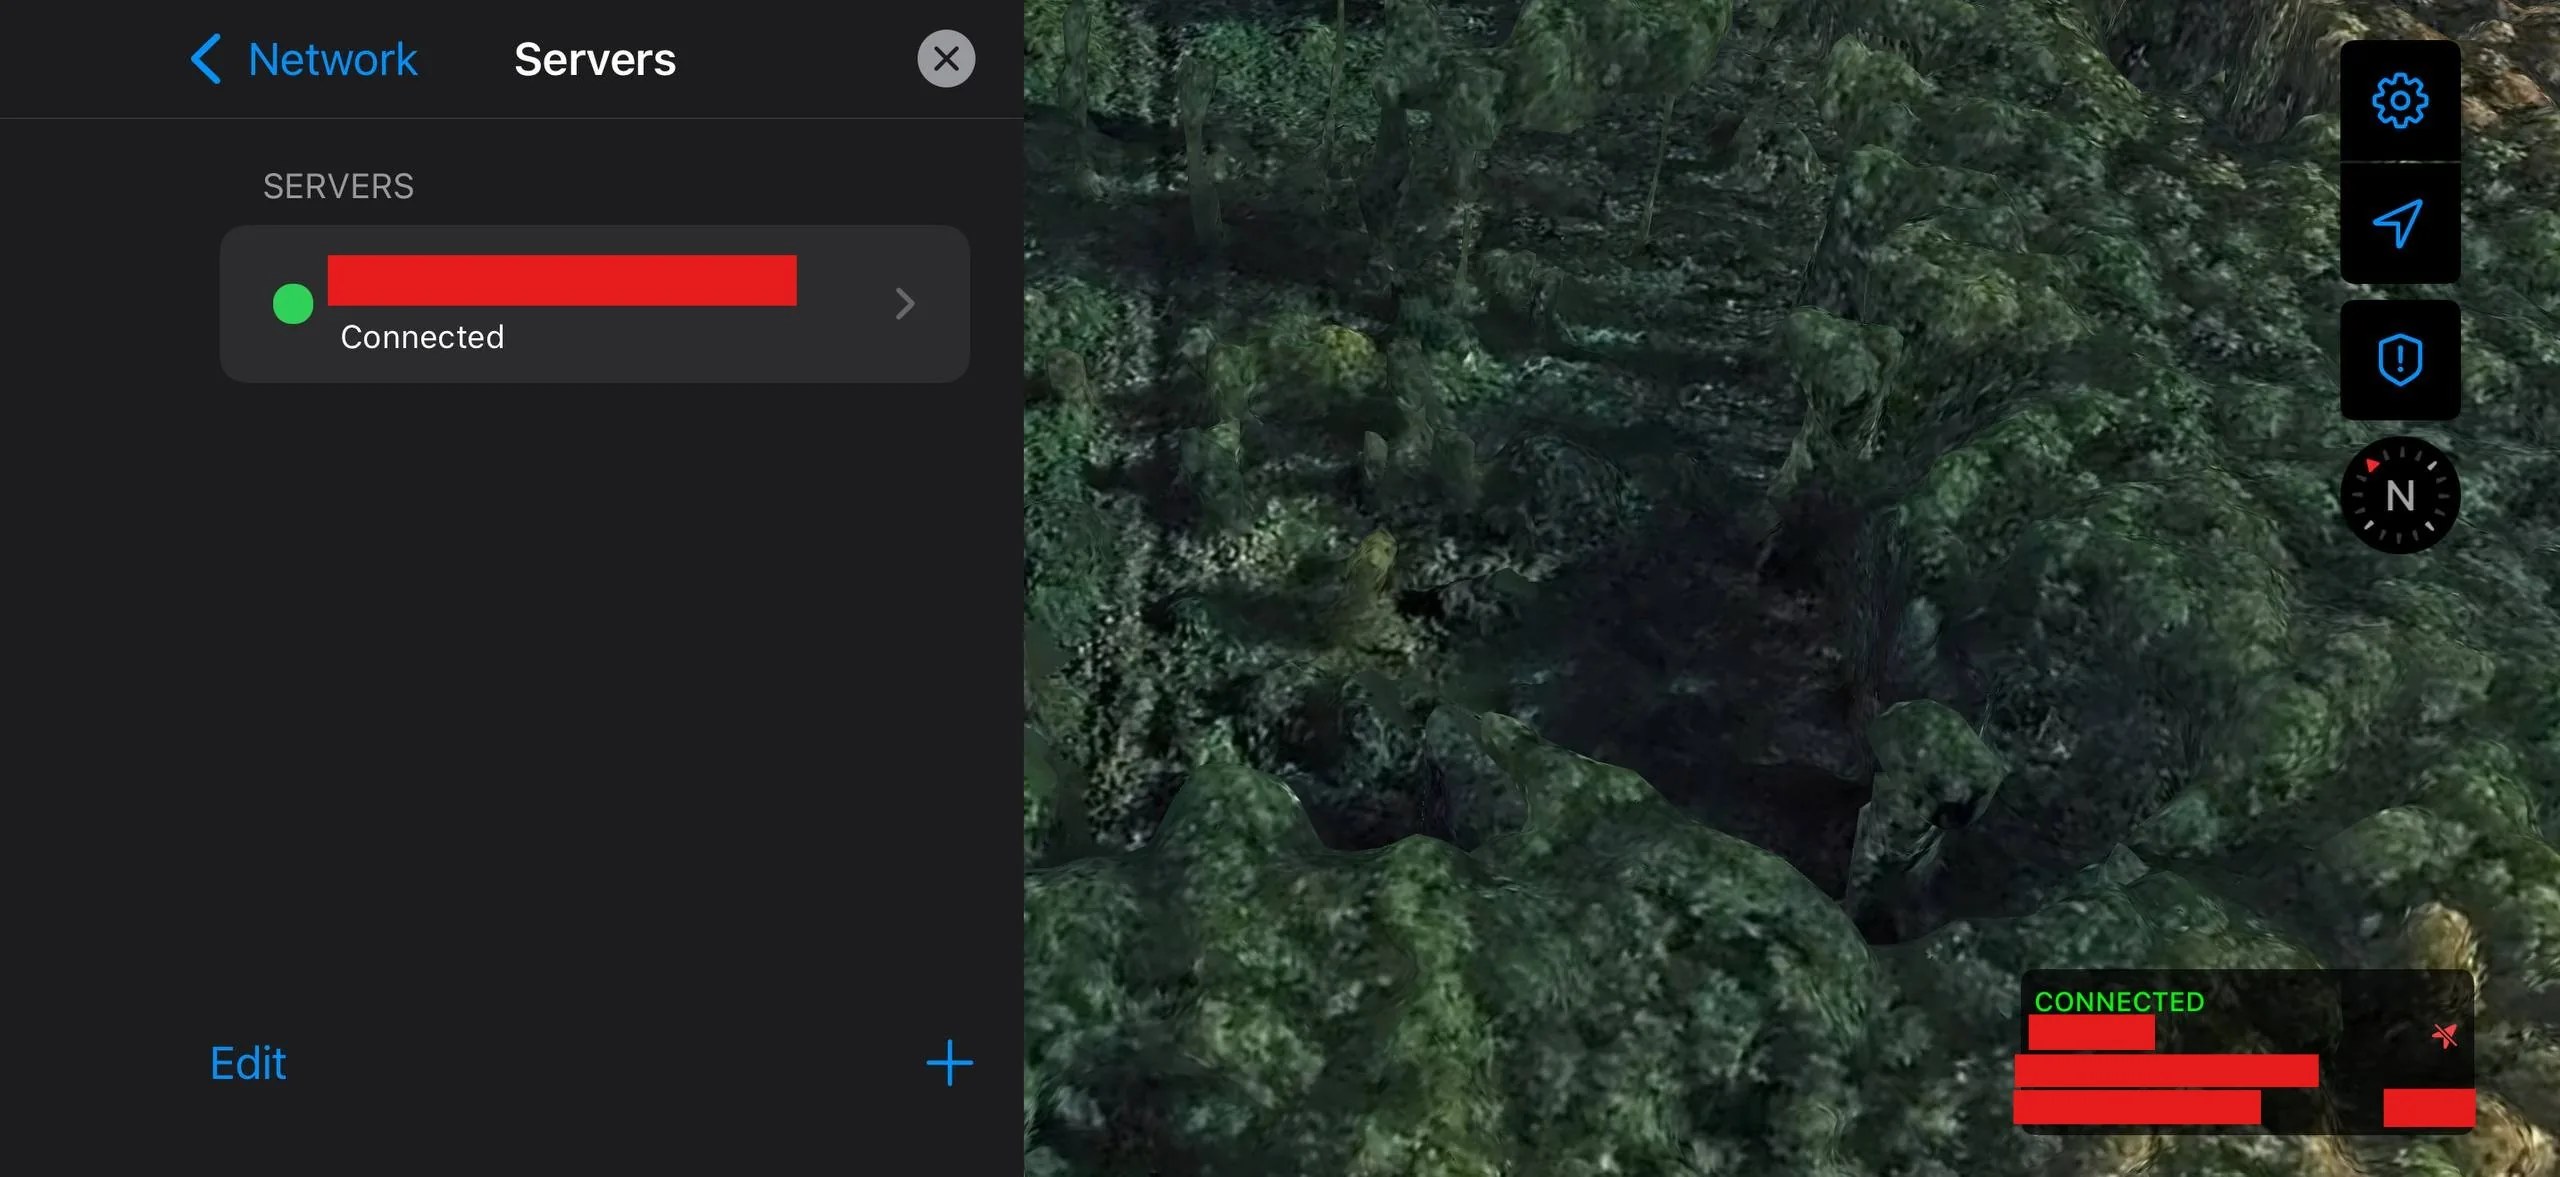
You are connected to the server. The green status indicator confirms the connection is active.
QR enrollment
ATAK QR Enrollment
Connect your Android device to the team server by scanning the QR code shown in the portal.
Manual login
iTAK Credential Login
Connect your iPhone or iPad using the server address, port, username, and password from the portal - without scanning a QR code.
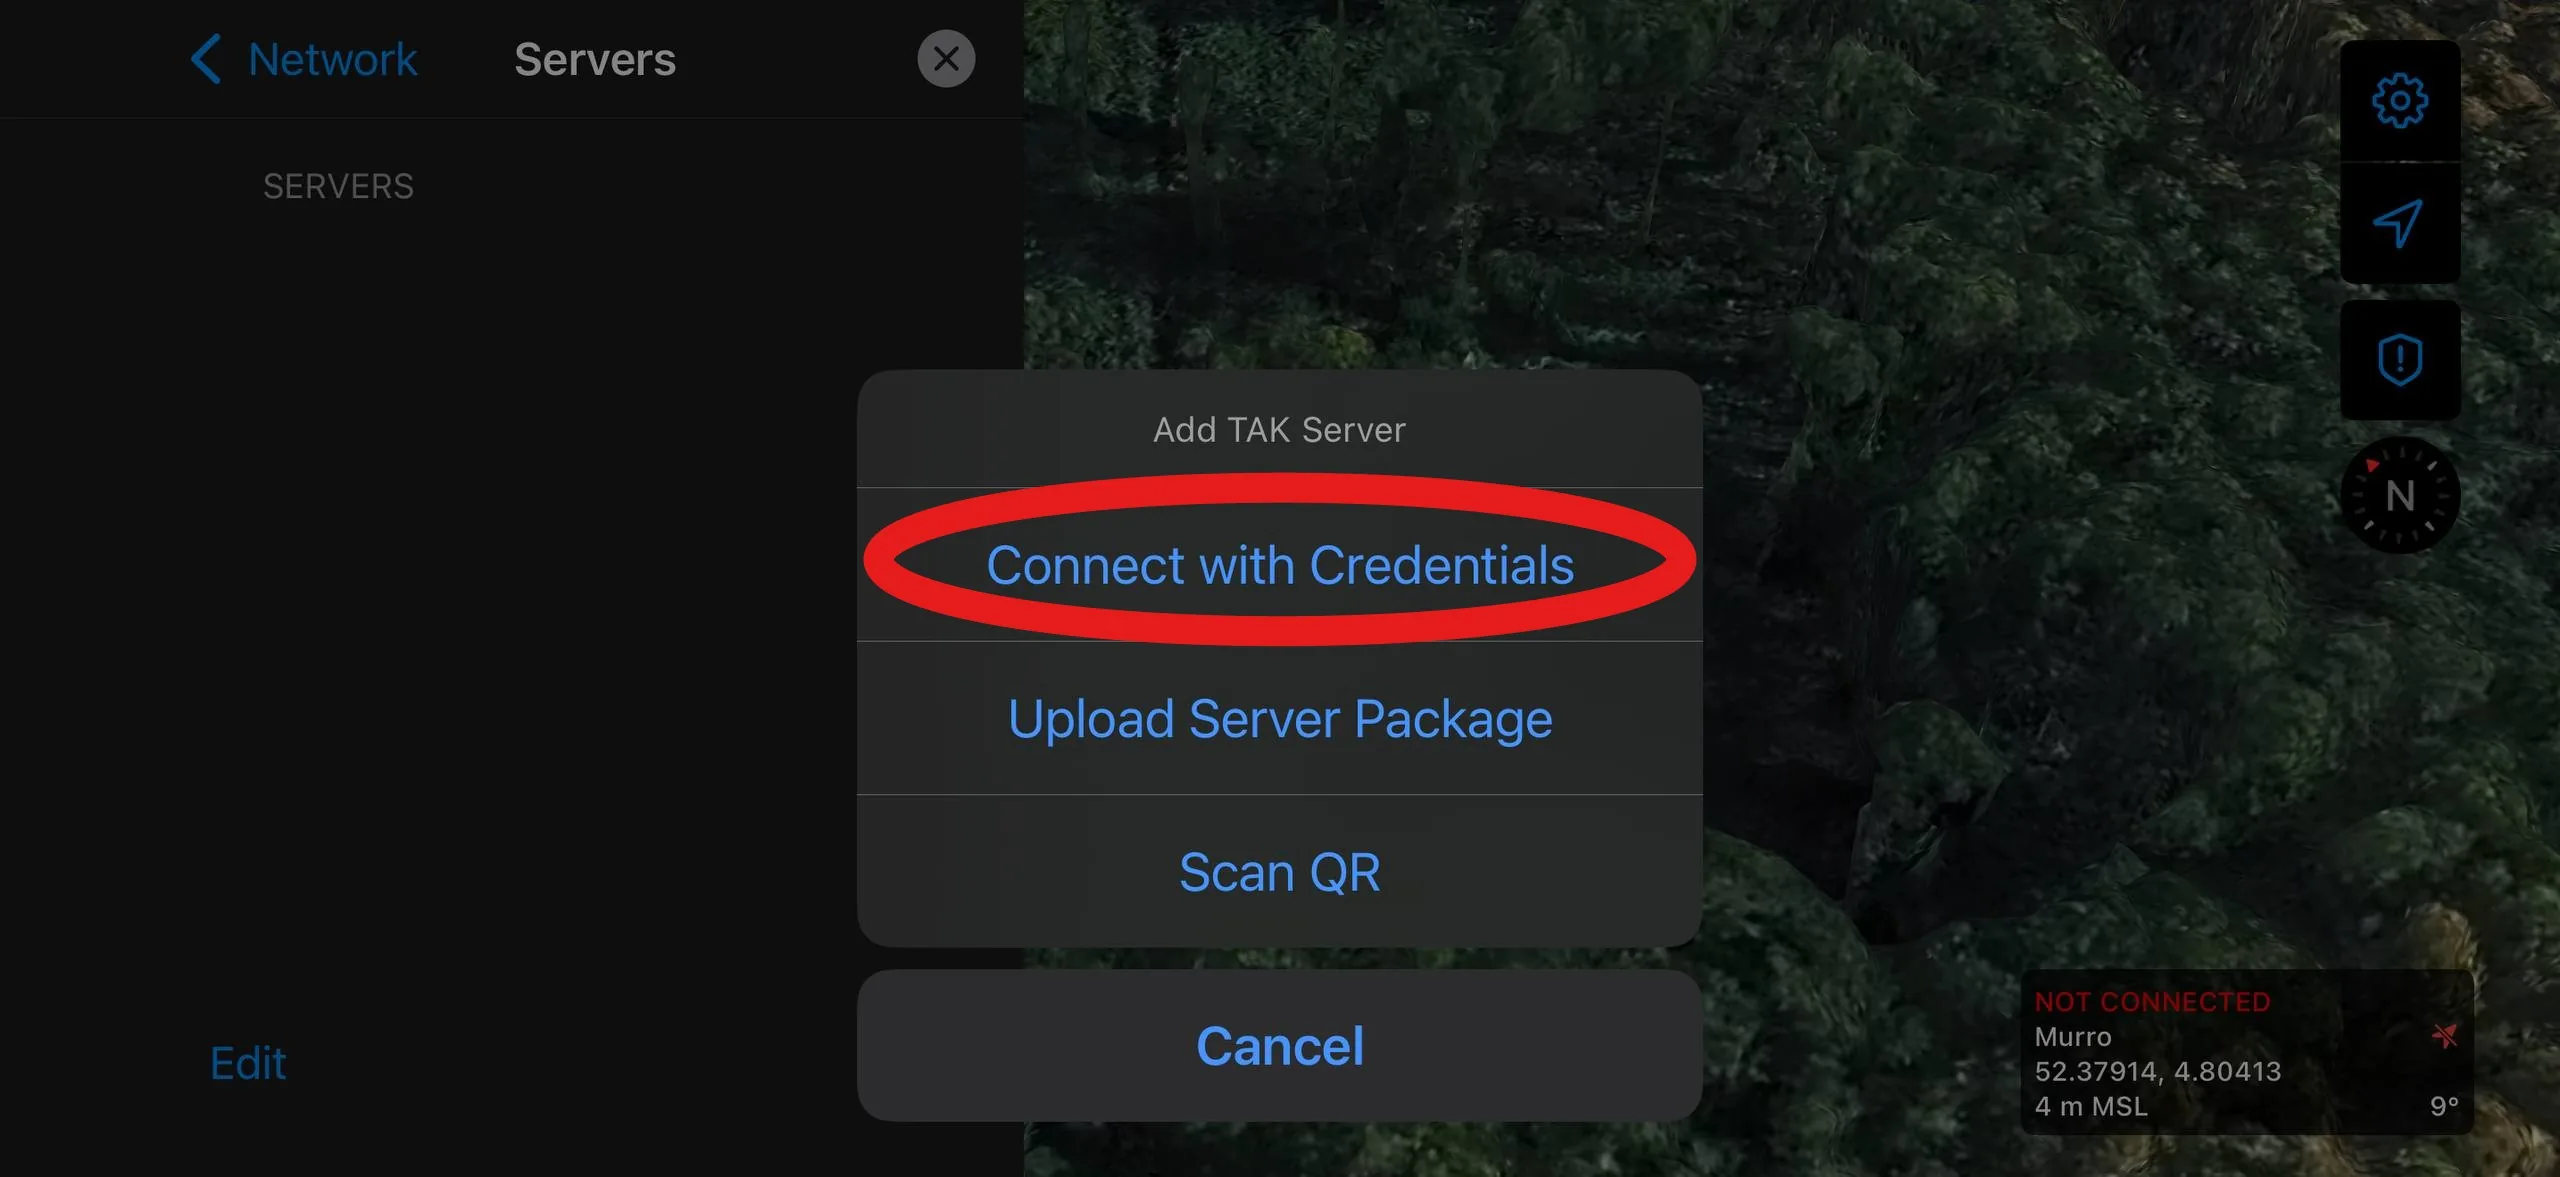
Open iTAK and tap the settings gear in the top-right corner.
Select Network.
Select Servers.
Tap the + button to add a new server.
Select "Connect with Credentials".
Fill in the connection details from the portal: set the address, port, protocol to SSL, and enter the username and password shown under Manual login. Tap Connect.
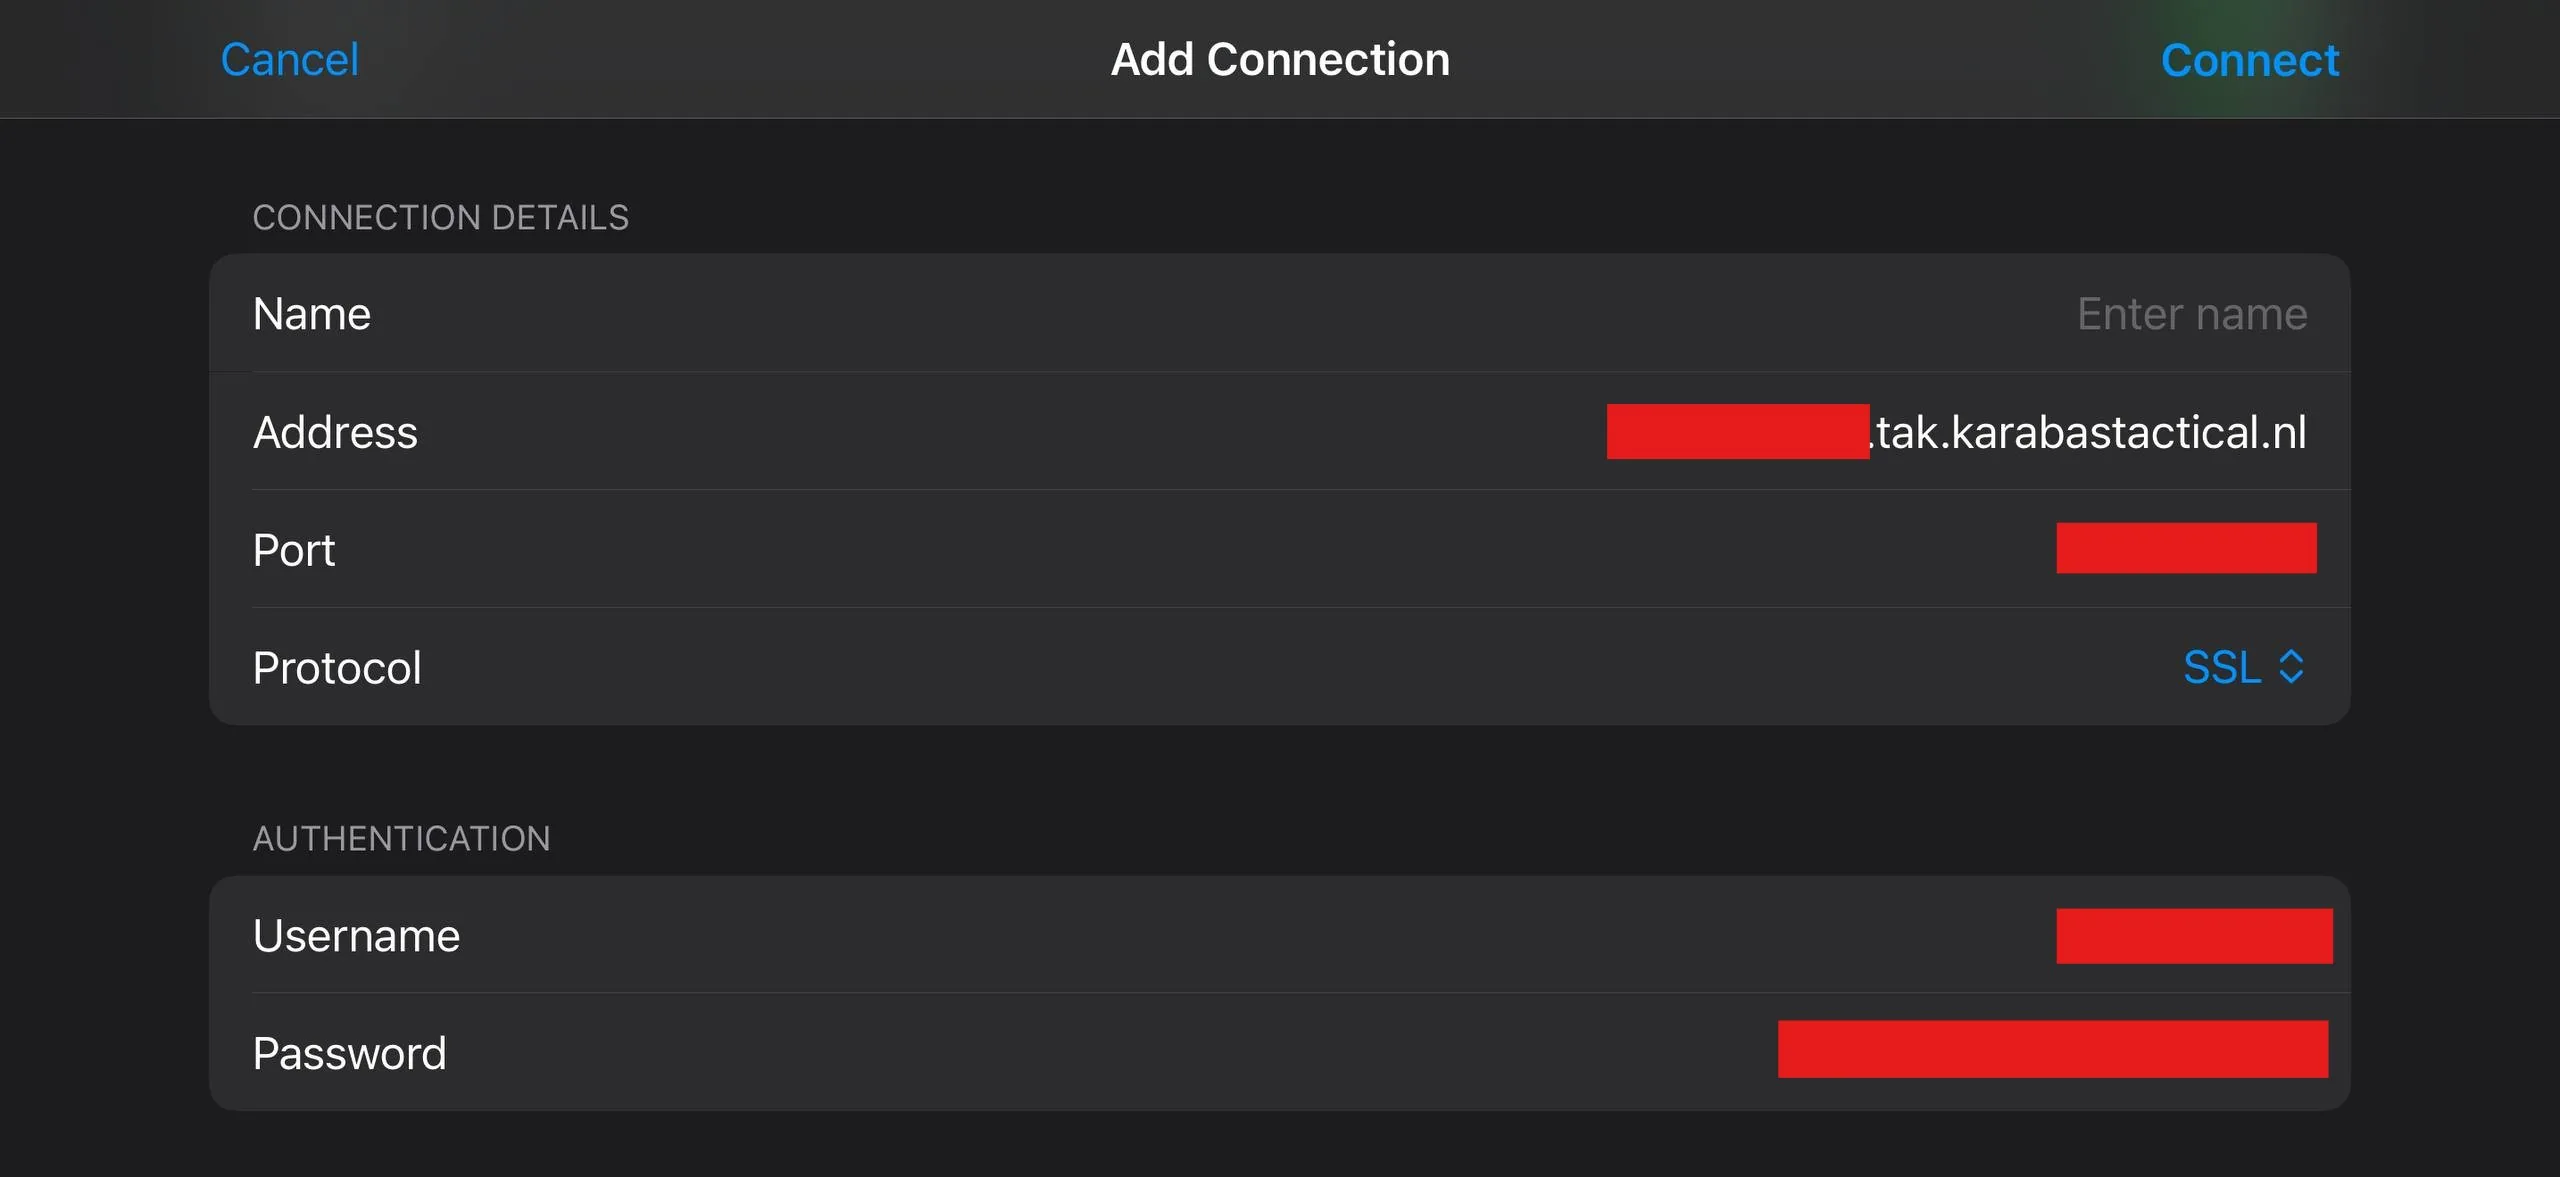
You are connected to the server. The green status indicator confirms the connection is active.
Manual login
ATAK Credential Login
Connect your Android device using the server address, port, username, and password from the portal.
Manual login
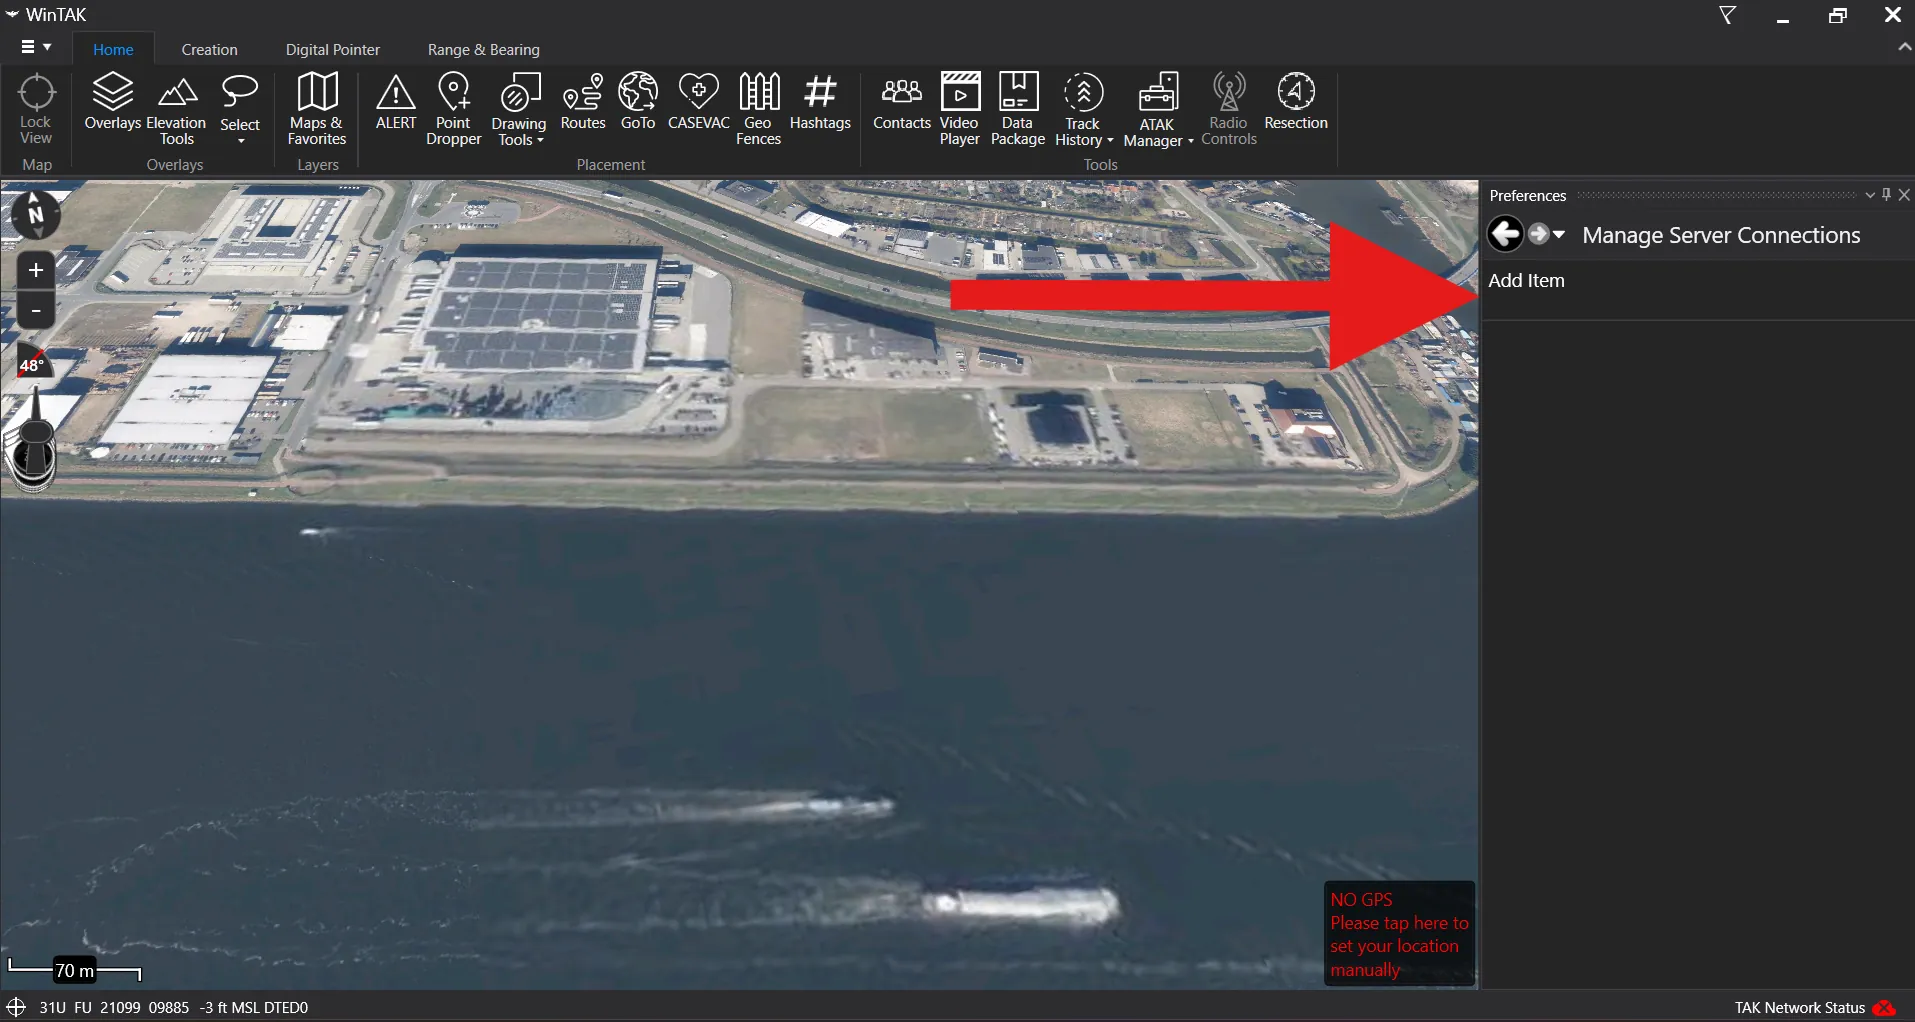
WinTAK Credential Login
Connect your Windows laptop or desktop using the server address, port, username, and password from the portal.
Open WinTAK and click the burger menu in the top-left corner.
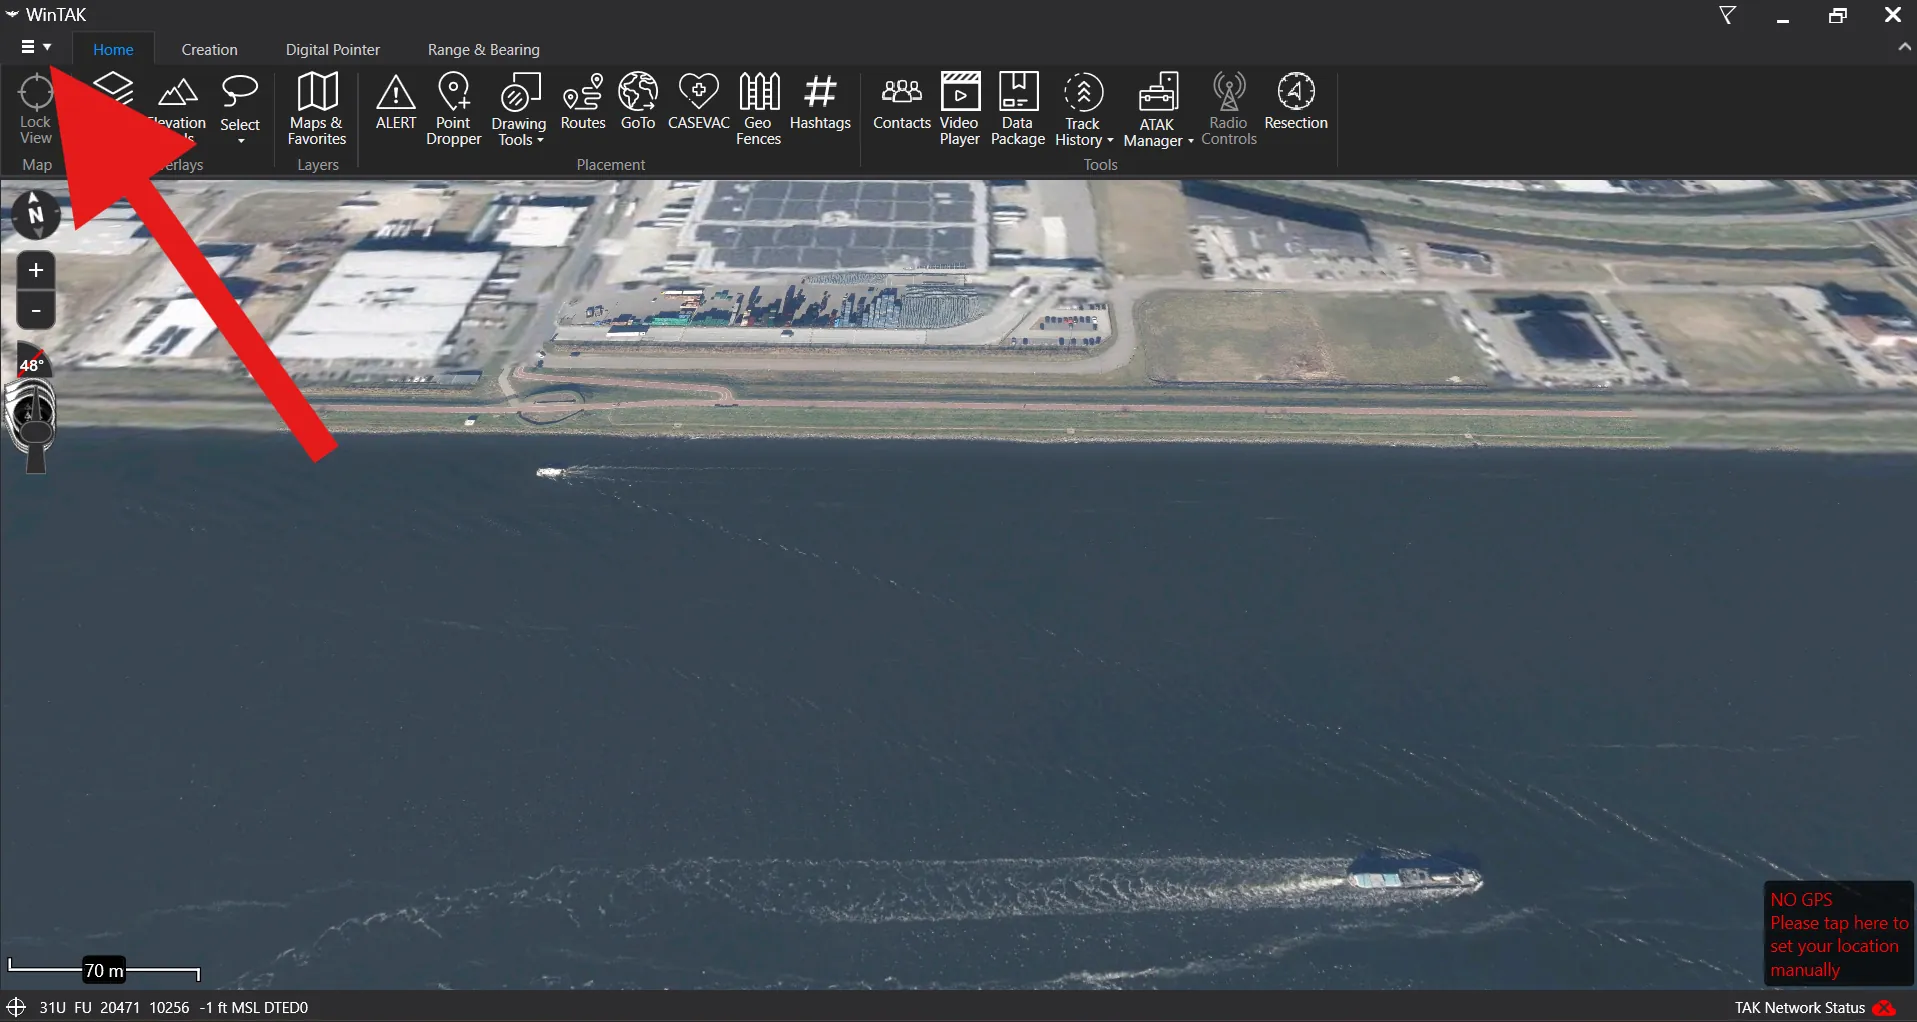
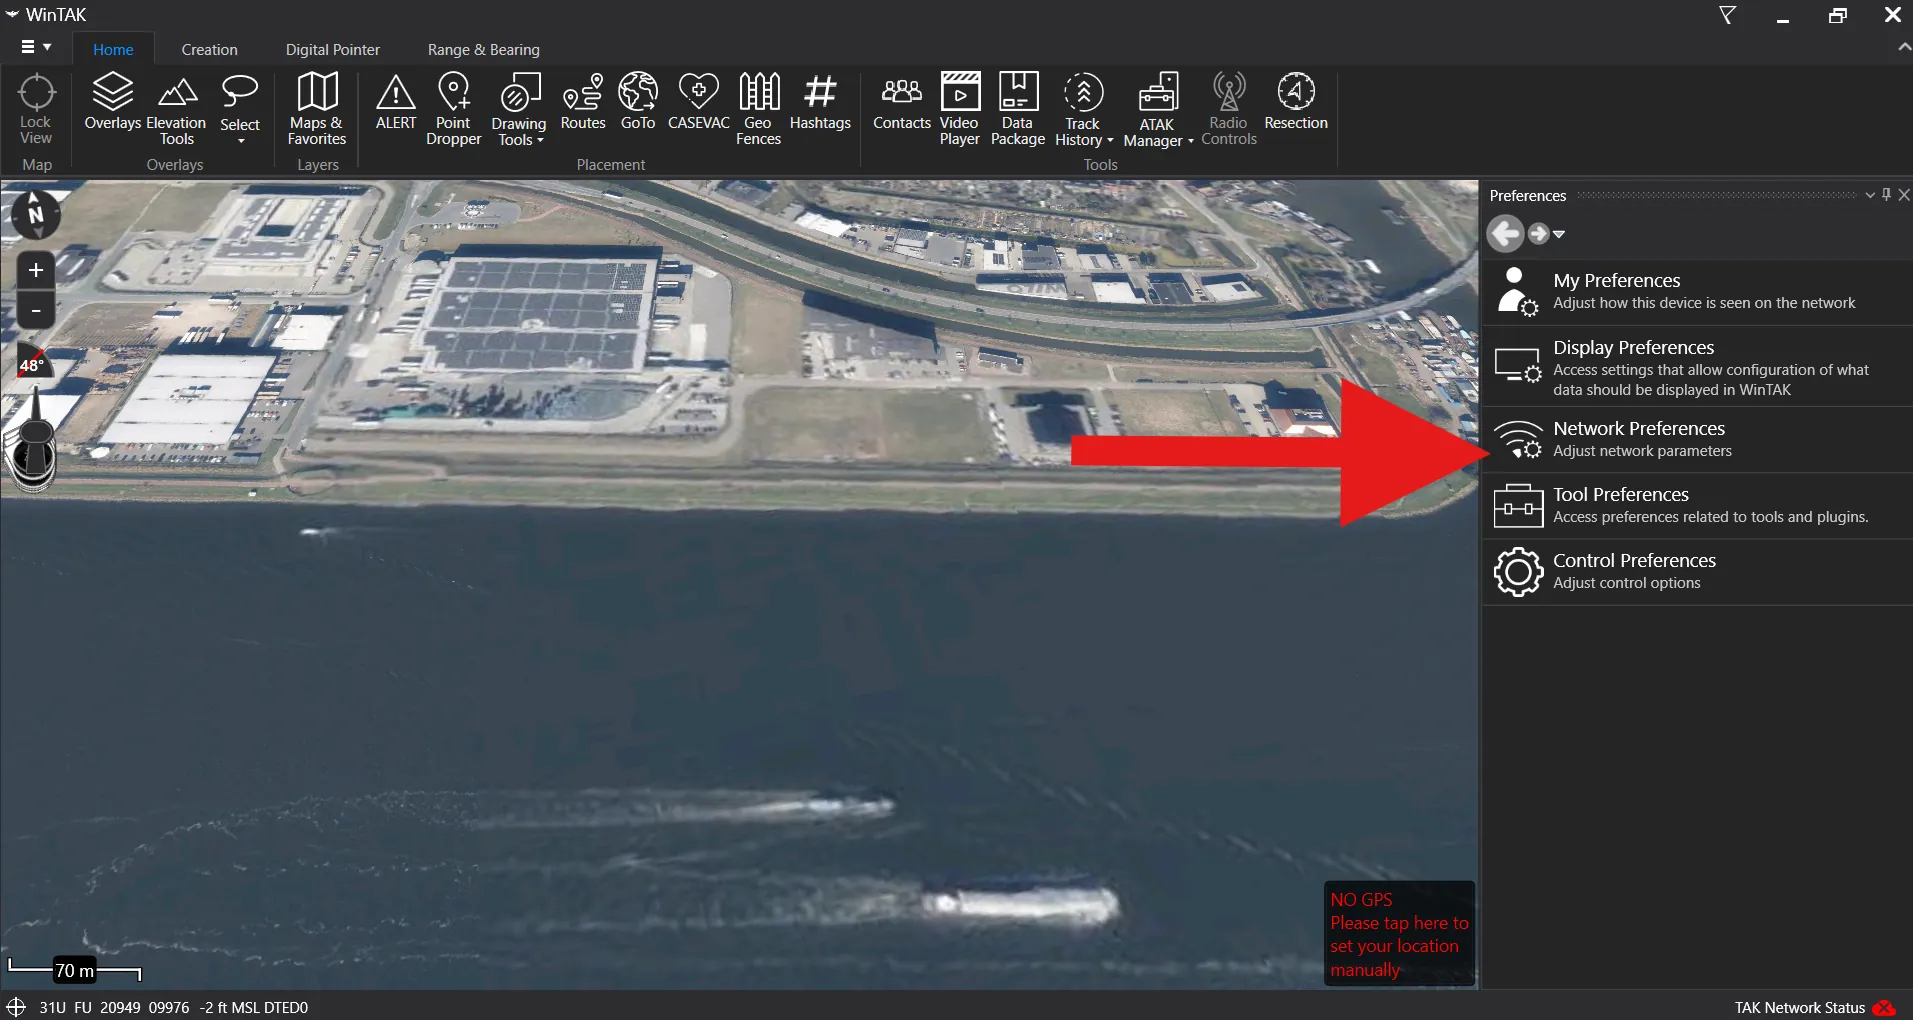
Select Settings.

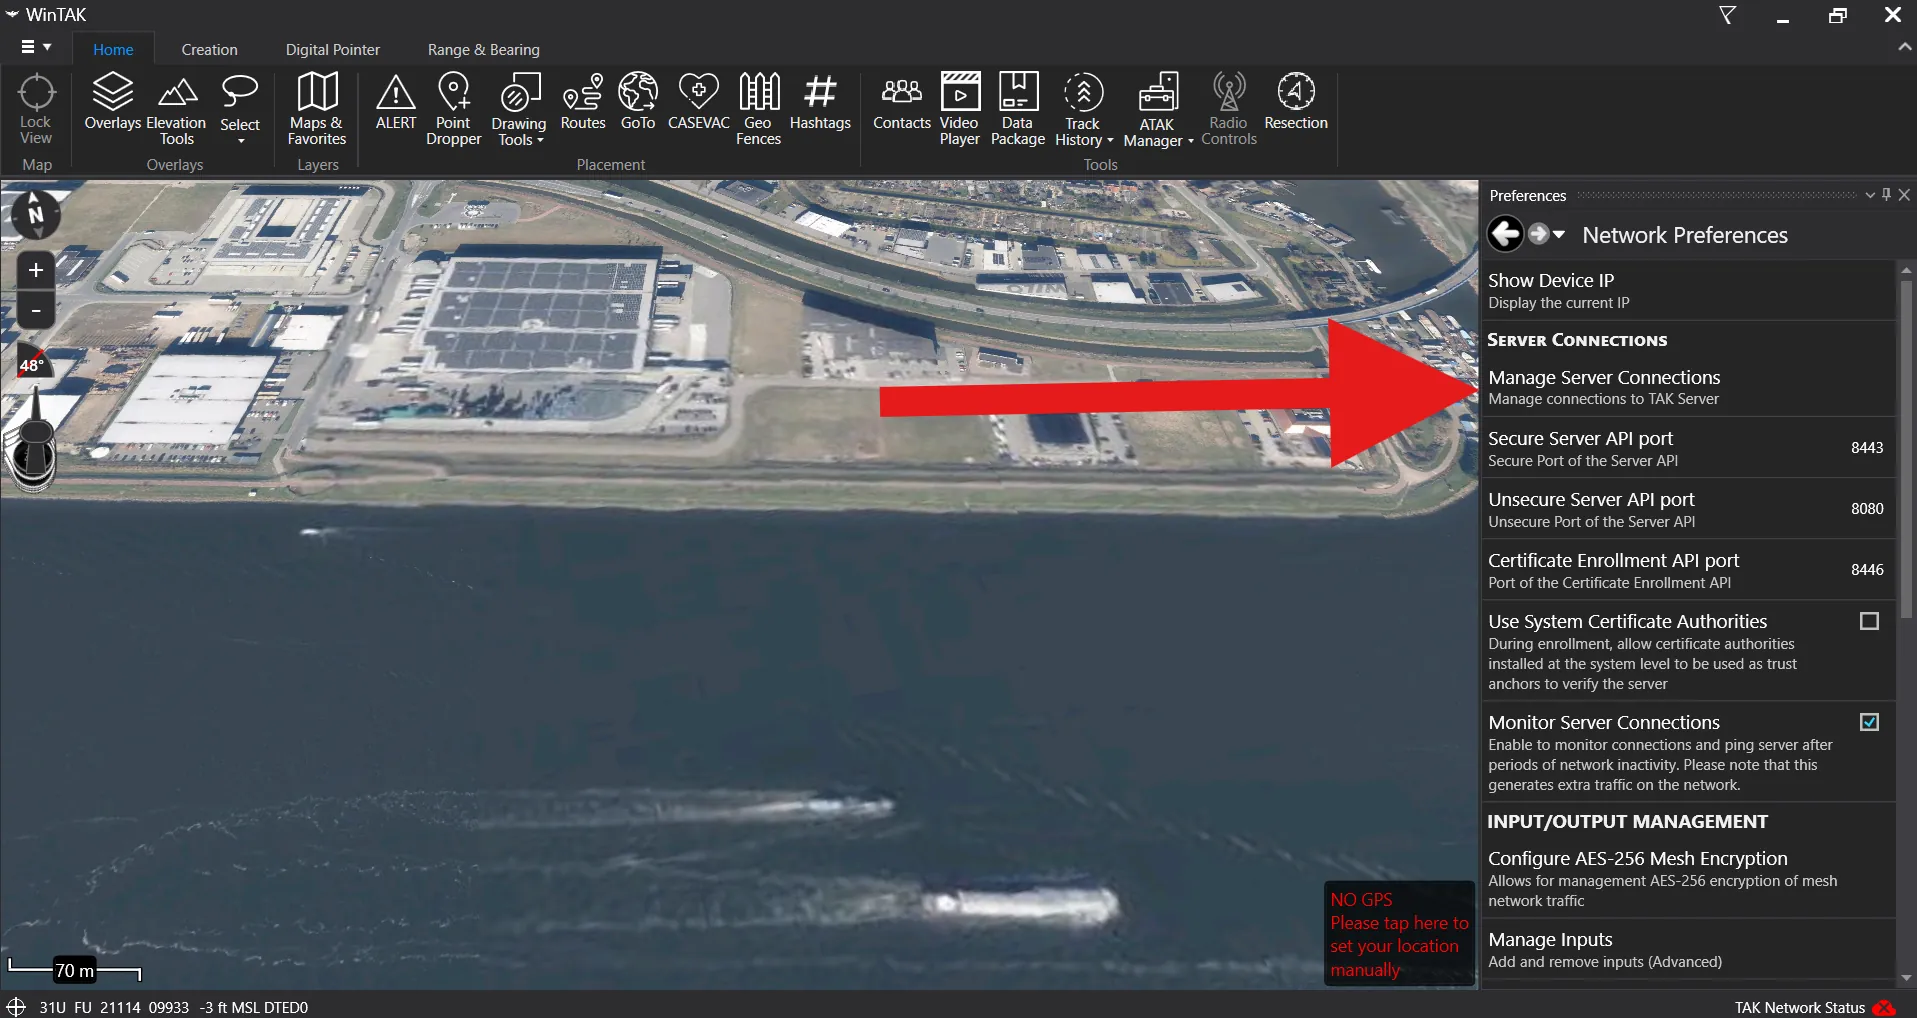
Open Network Preferences.
Select Manage Server Connections.
Click Add Item.
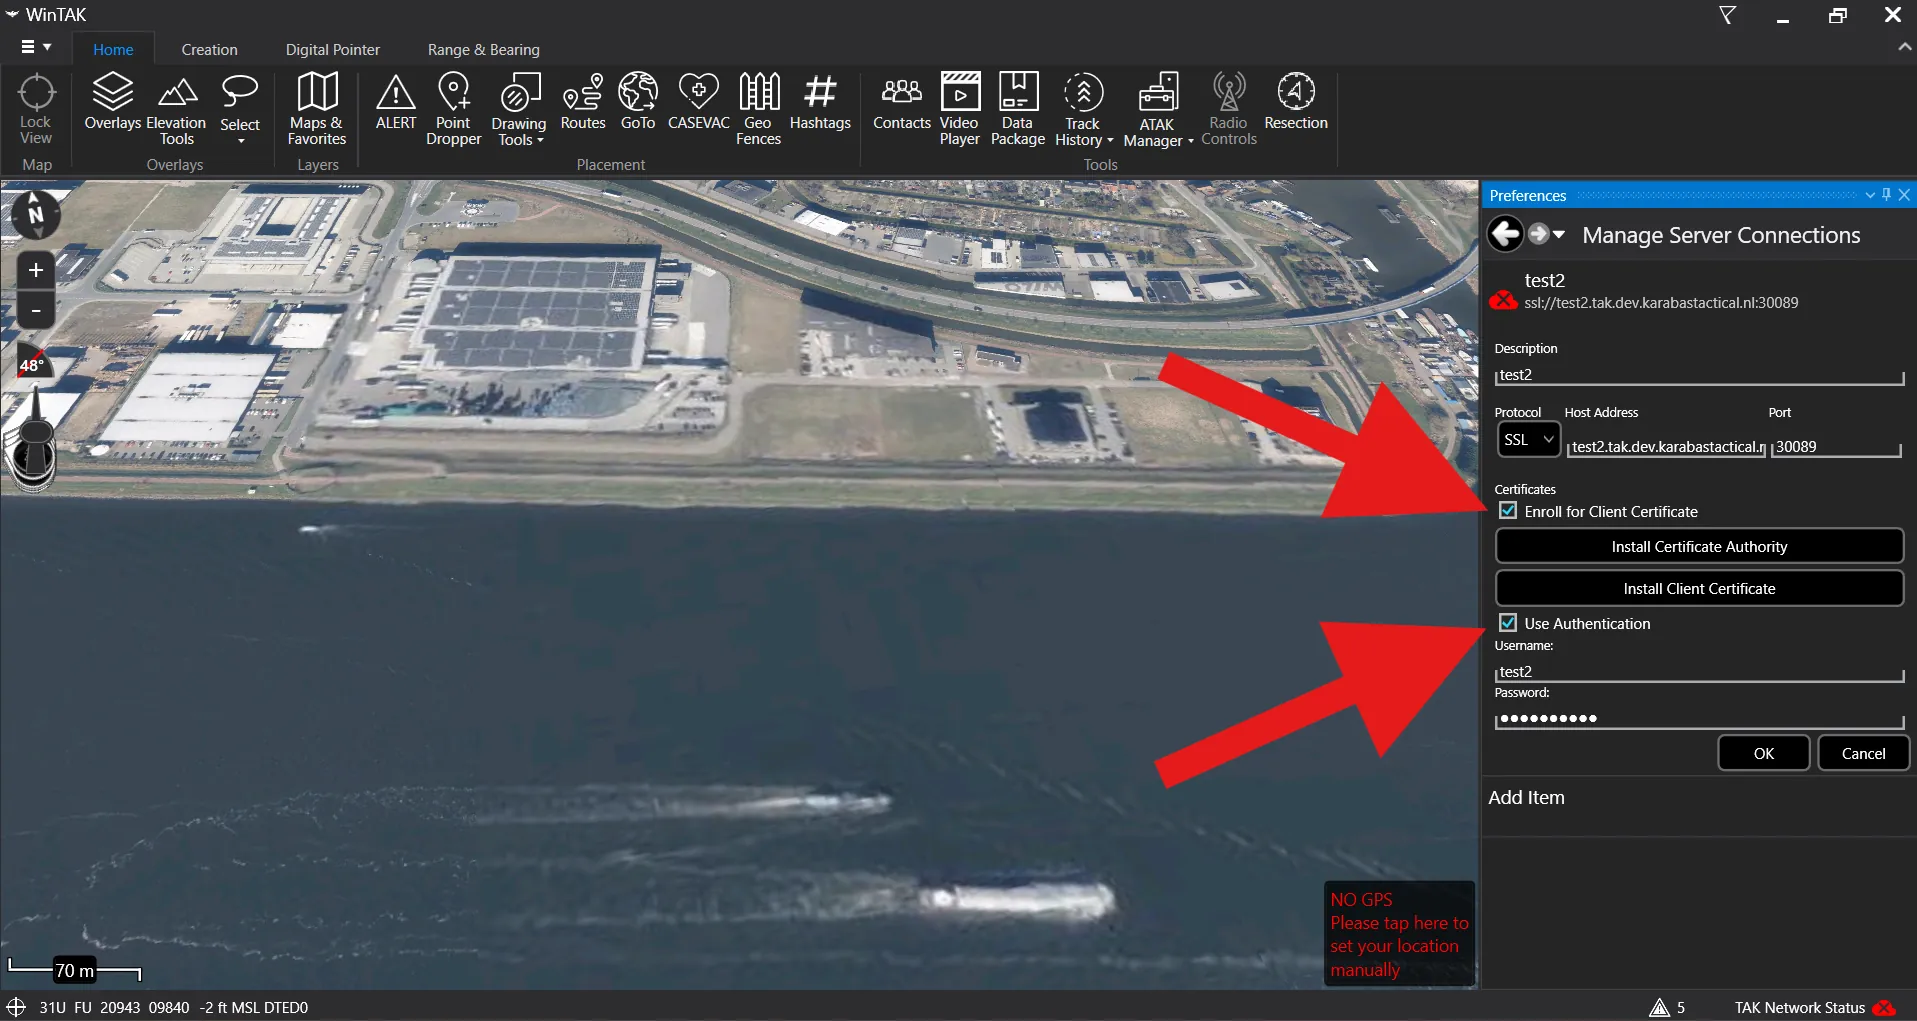
Fill in the connection details provided in the portal. Set the protocol to SSL, enter the host address and port, and make sure Enroll for Client Certificate and Use Authentication are both checked. Then click OK.
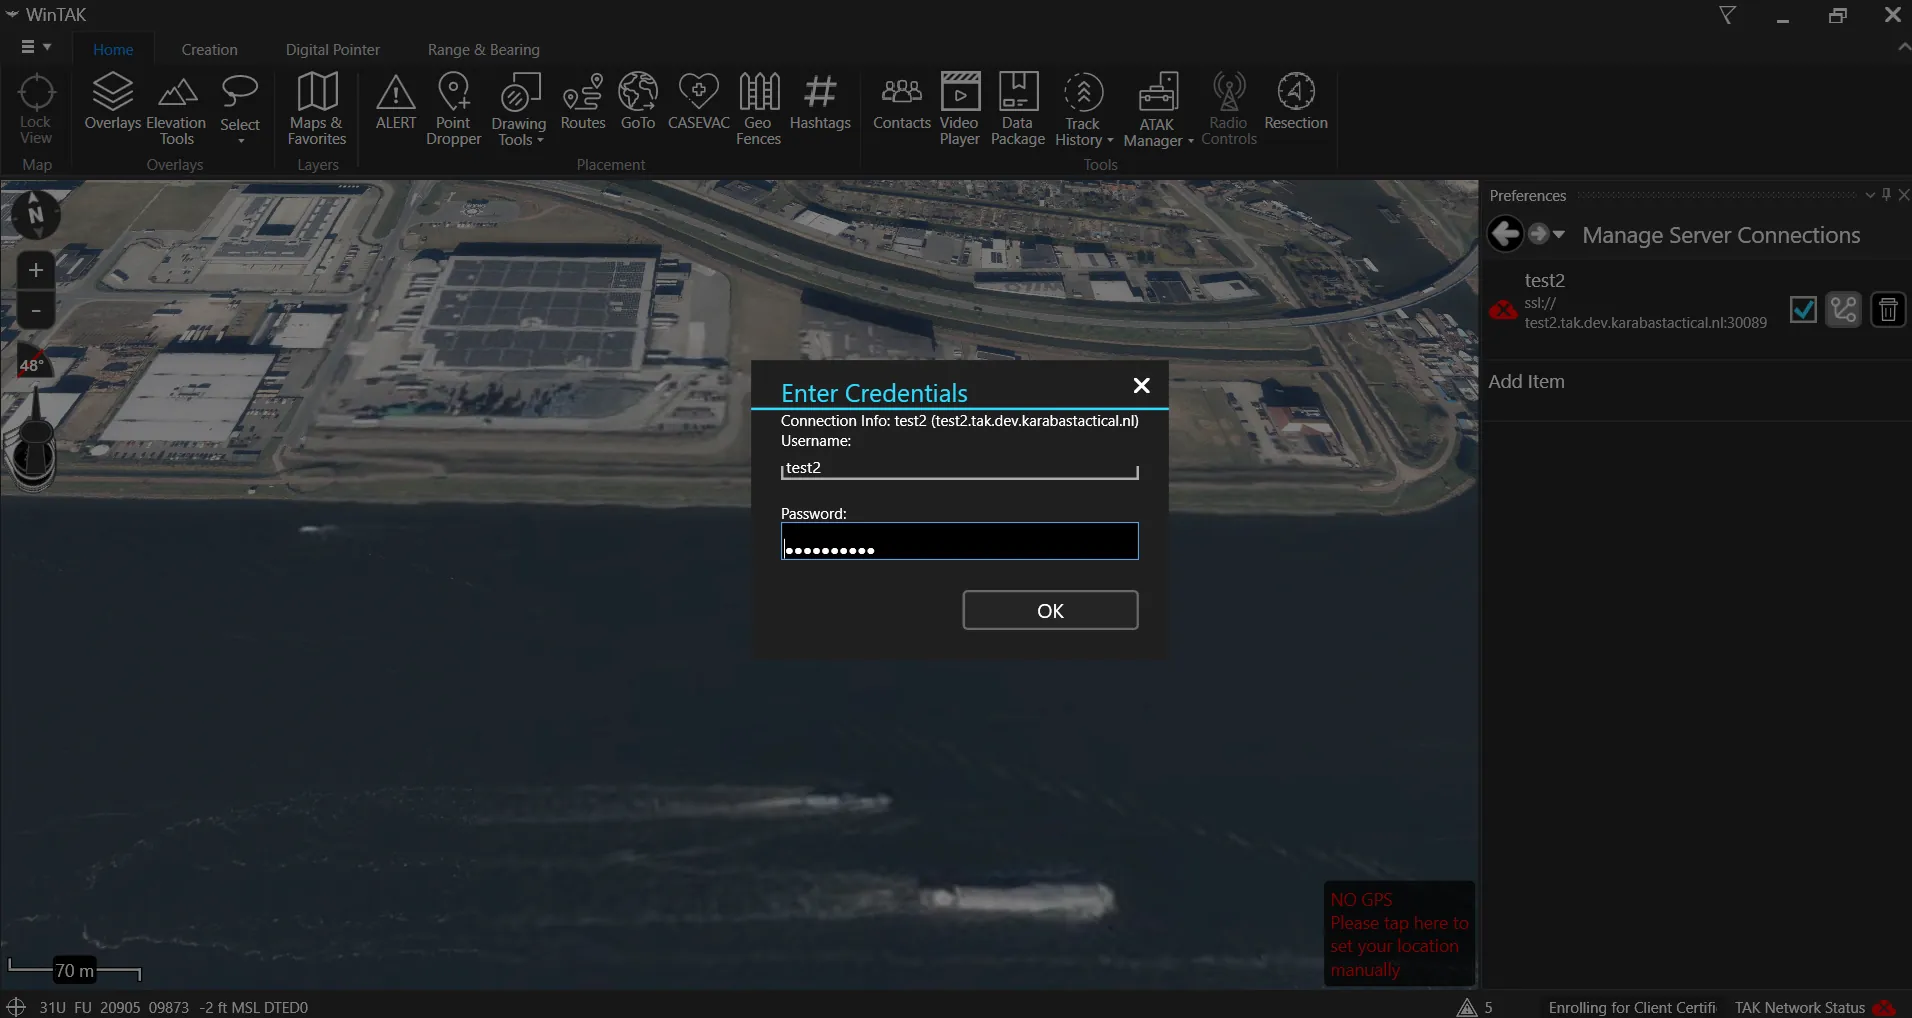
Enter the provided username and password again in the authentication prompt, then click OK.
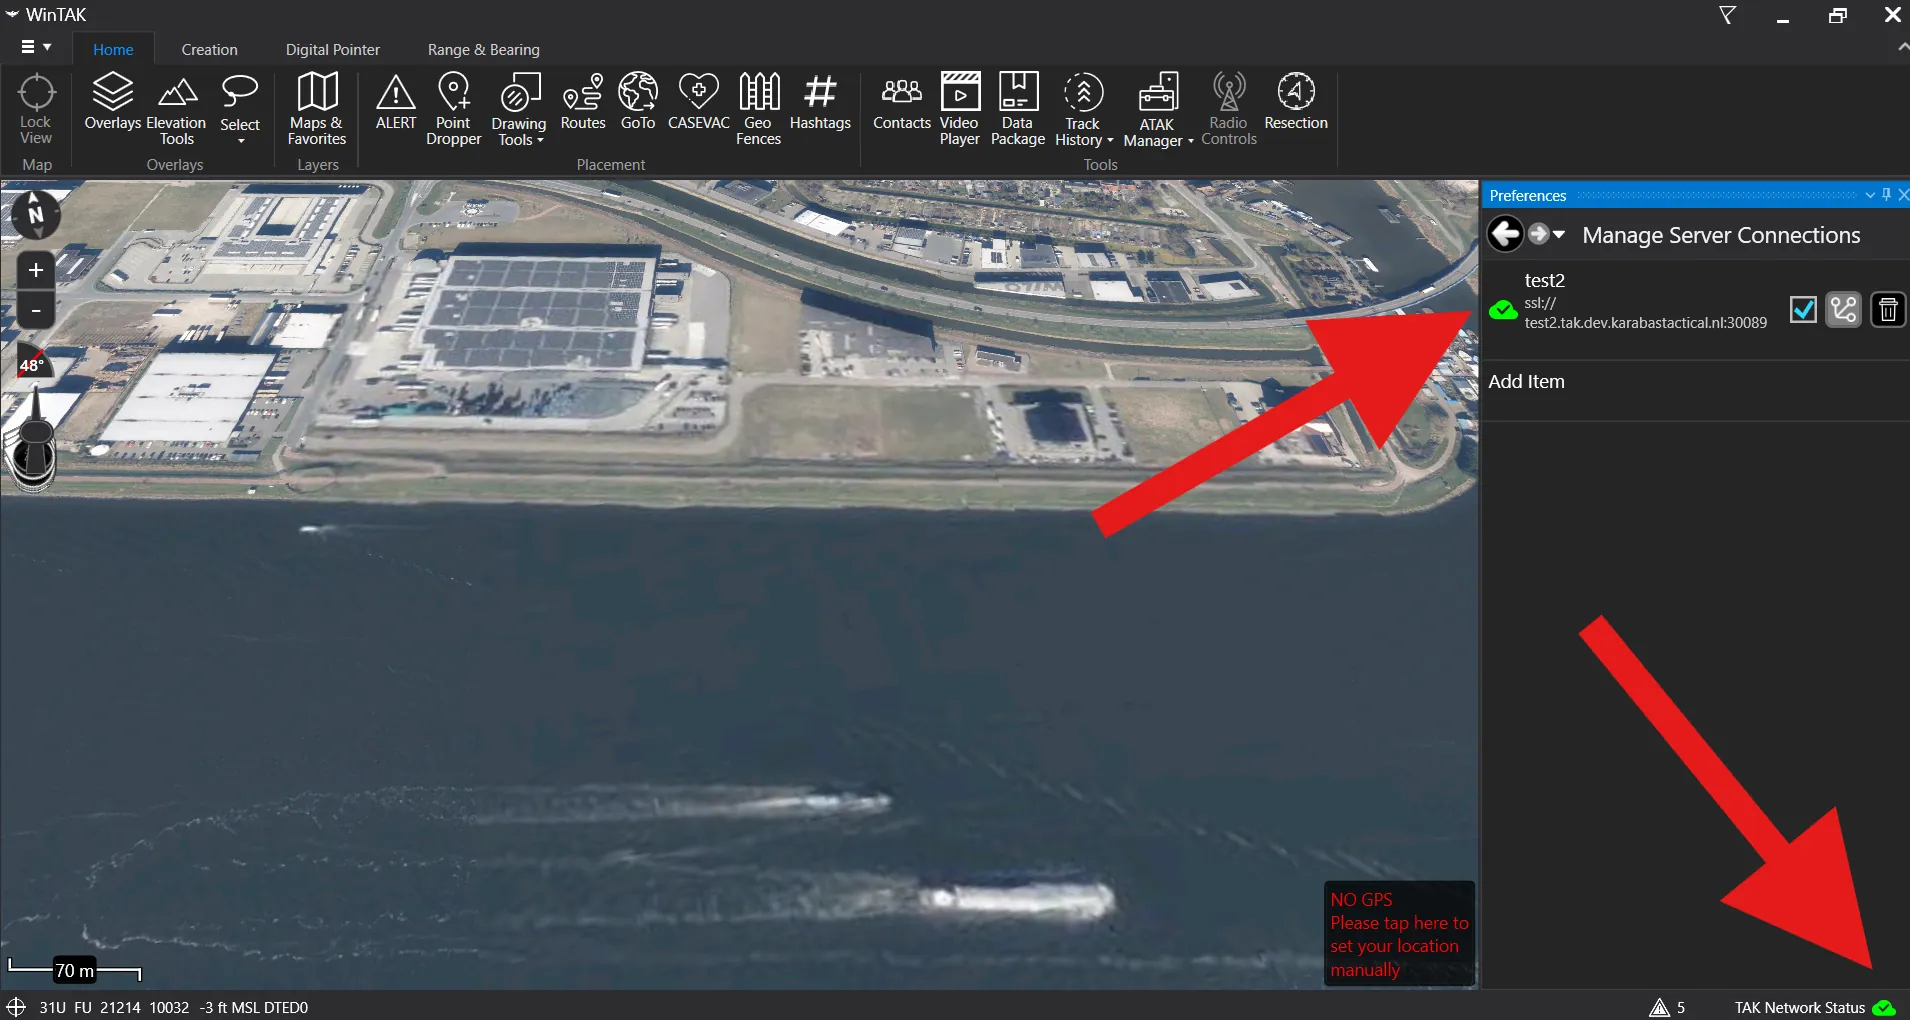
You are connected to the server. The green server status indicators confirm the WinTAK connection is active.
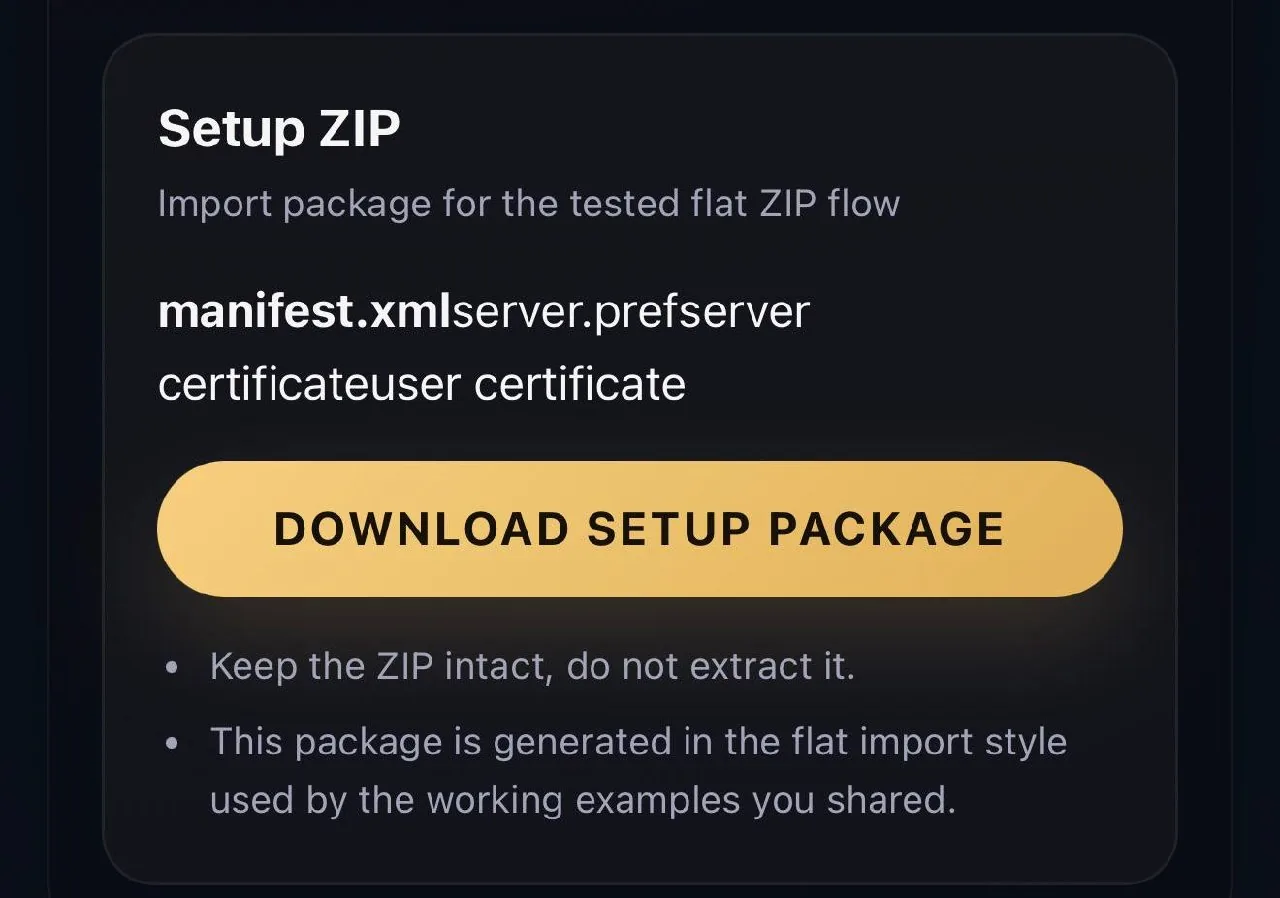
ZIP package import
iTAK ZIP Import
Import the setup package into iTAK on iPhone or iPad. Download the ZIP from the portal first and keep it intact - do not extract it.
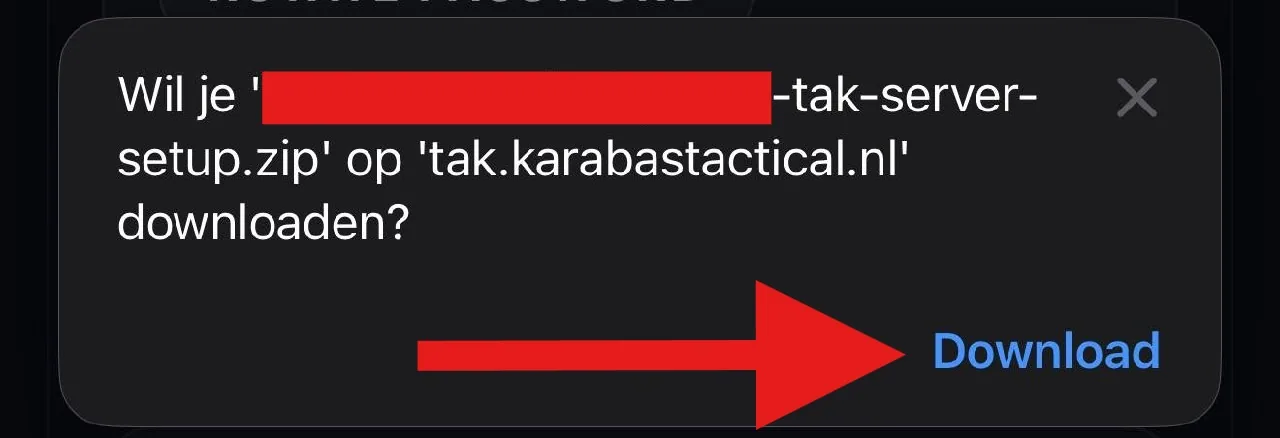
In the portal, tap "Download setup package" on the Setup ZIP card.
When your browser asks to confirm the download, tap Download. The ZIP file will be saved to your device.
Open iTAK and tap the settings gear in the top-right corner.
Select Network.
Select Servers.
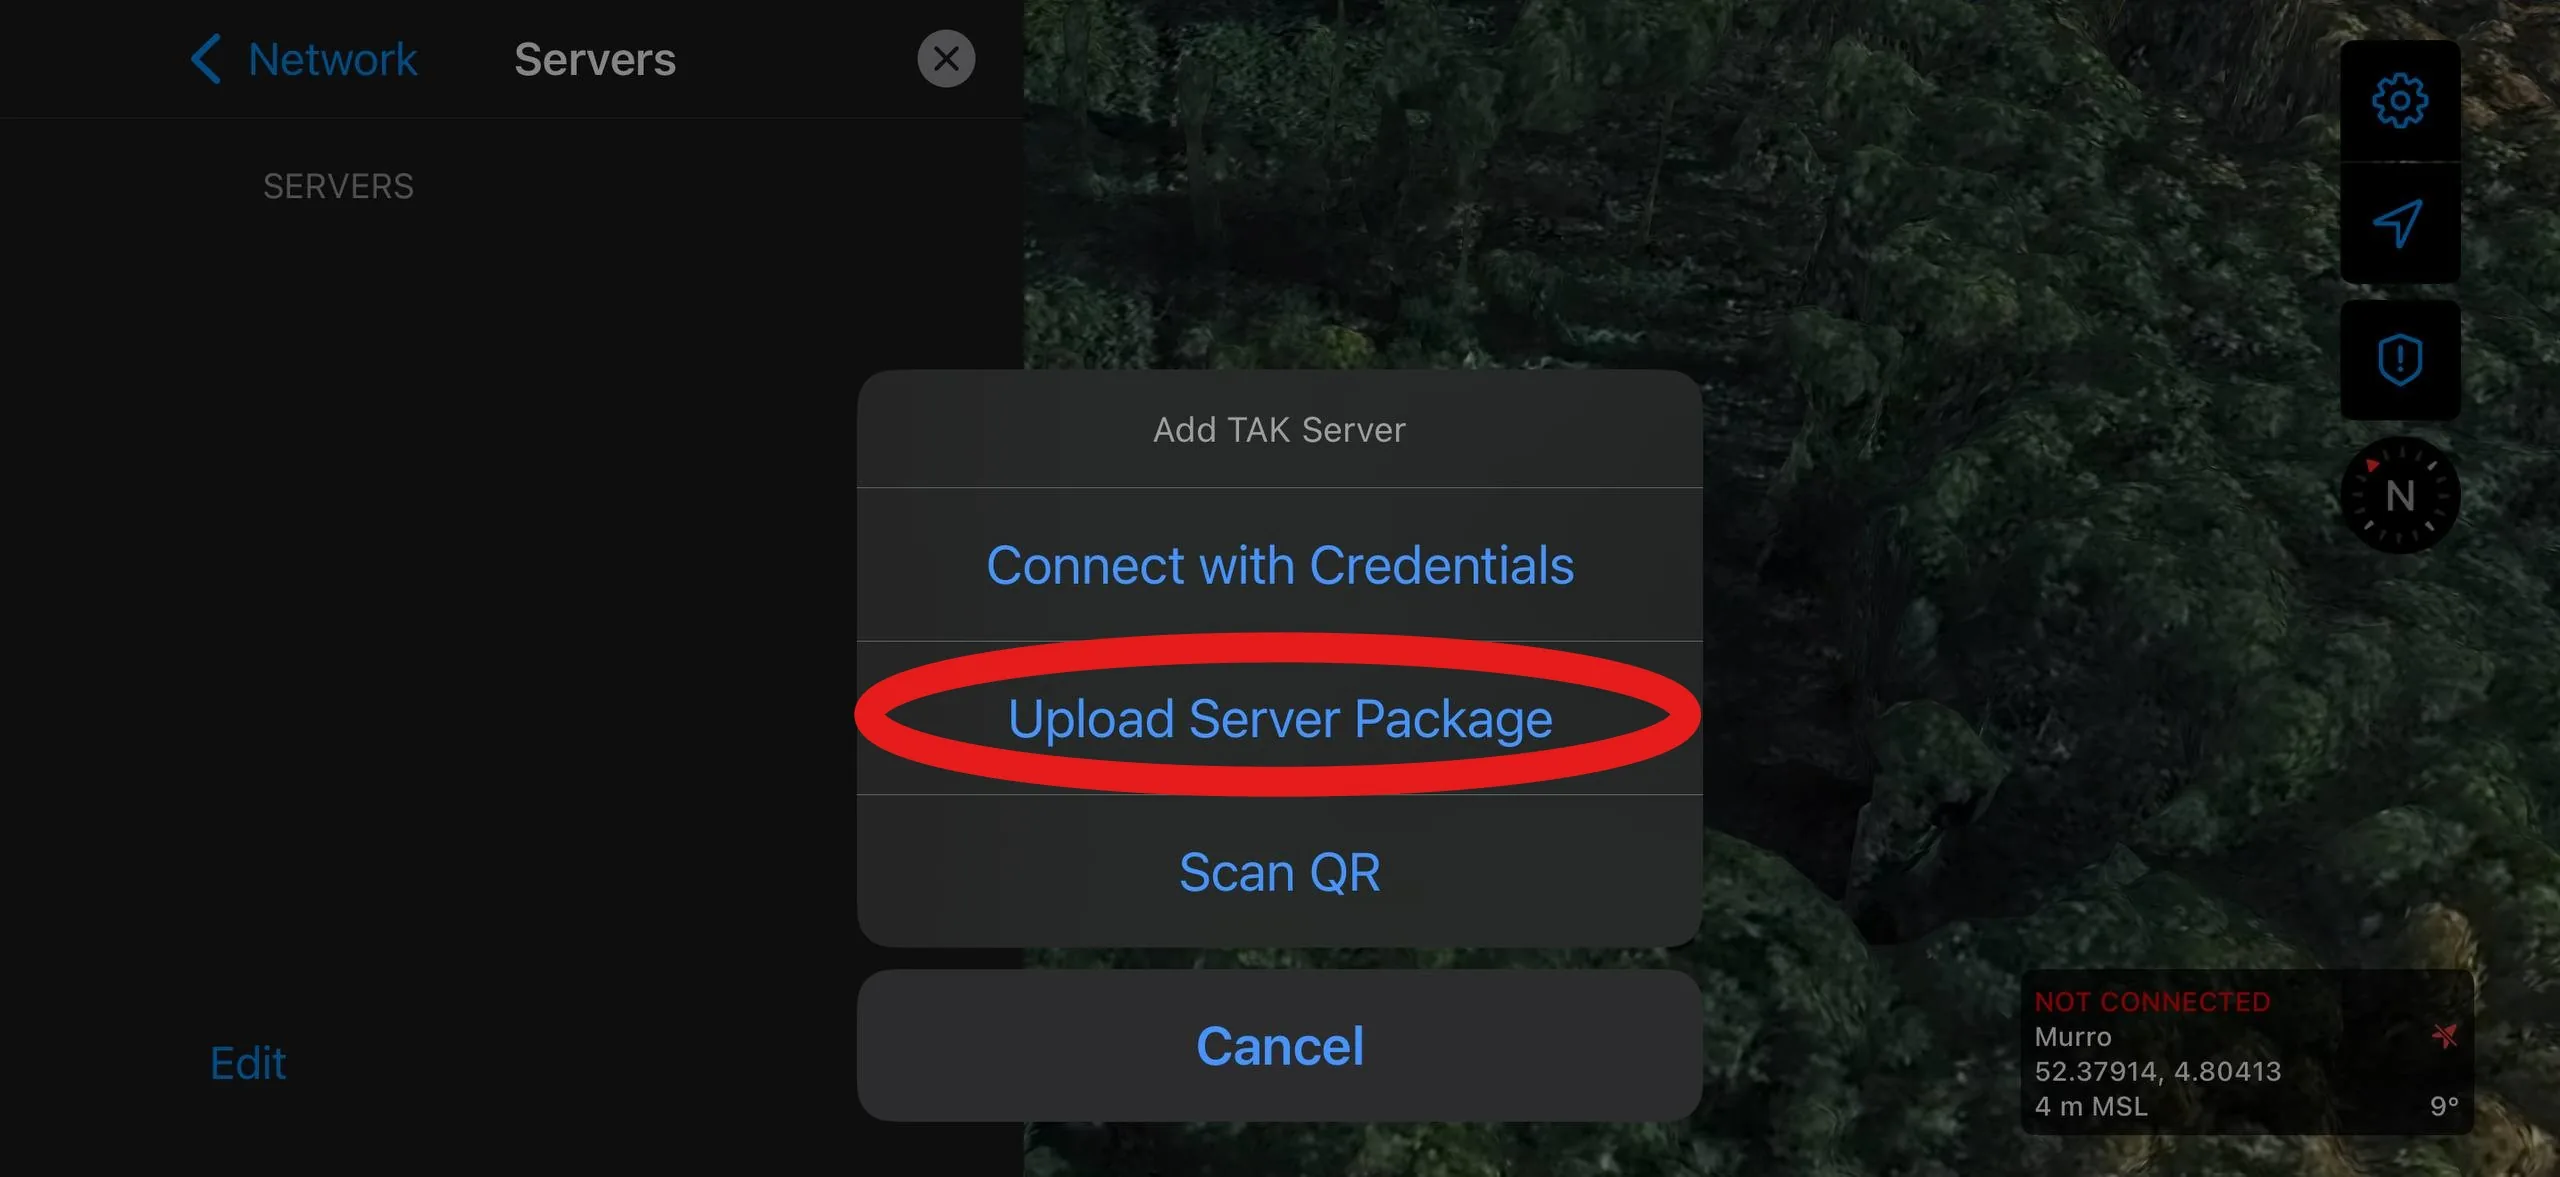
Tap the + button to add a new server.
Select "Upload Server Package".
Browse to the downloaded ZIP file in Files and select it. Do not extract the ZIP - iTAK needs the original file.
You are connected to the server. The green status indicator confirms the connection is active.
ZIP package import
ATAK ZIP Import
Import the setup package into ATAK on Android. Download the ZIP from the portal and keep it intact - do not extract it.
ZIP package import
WinTAK ZIP Import
Import the setup package into WinTAK on Windows. Download the ZIP from the portal and keep it intact - do not extract it.
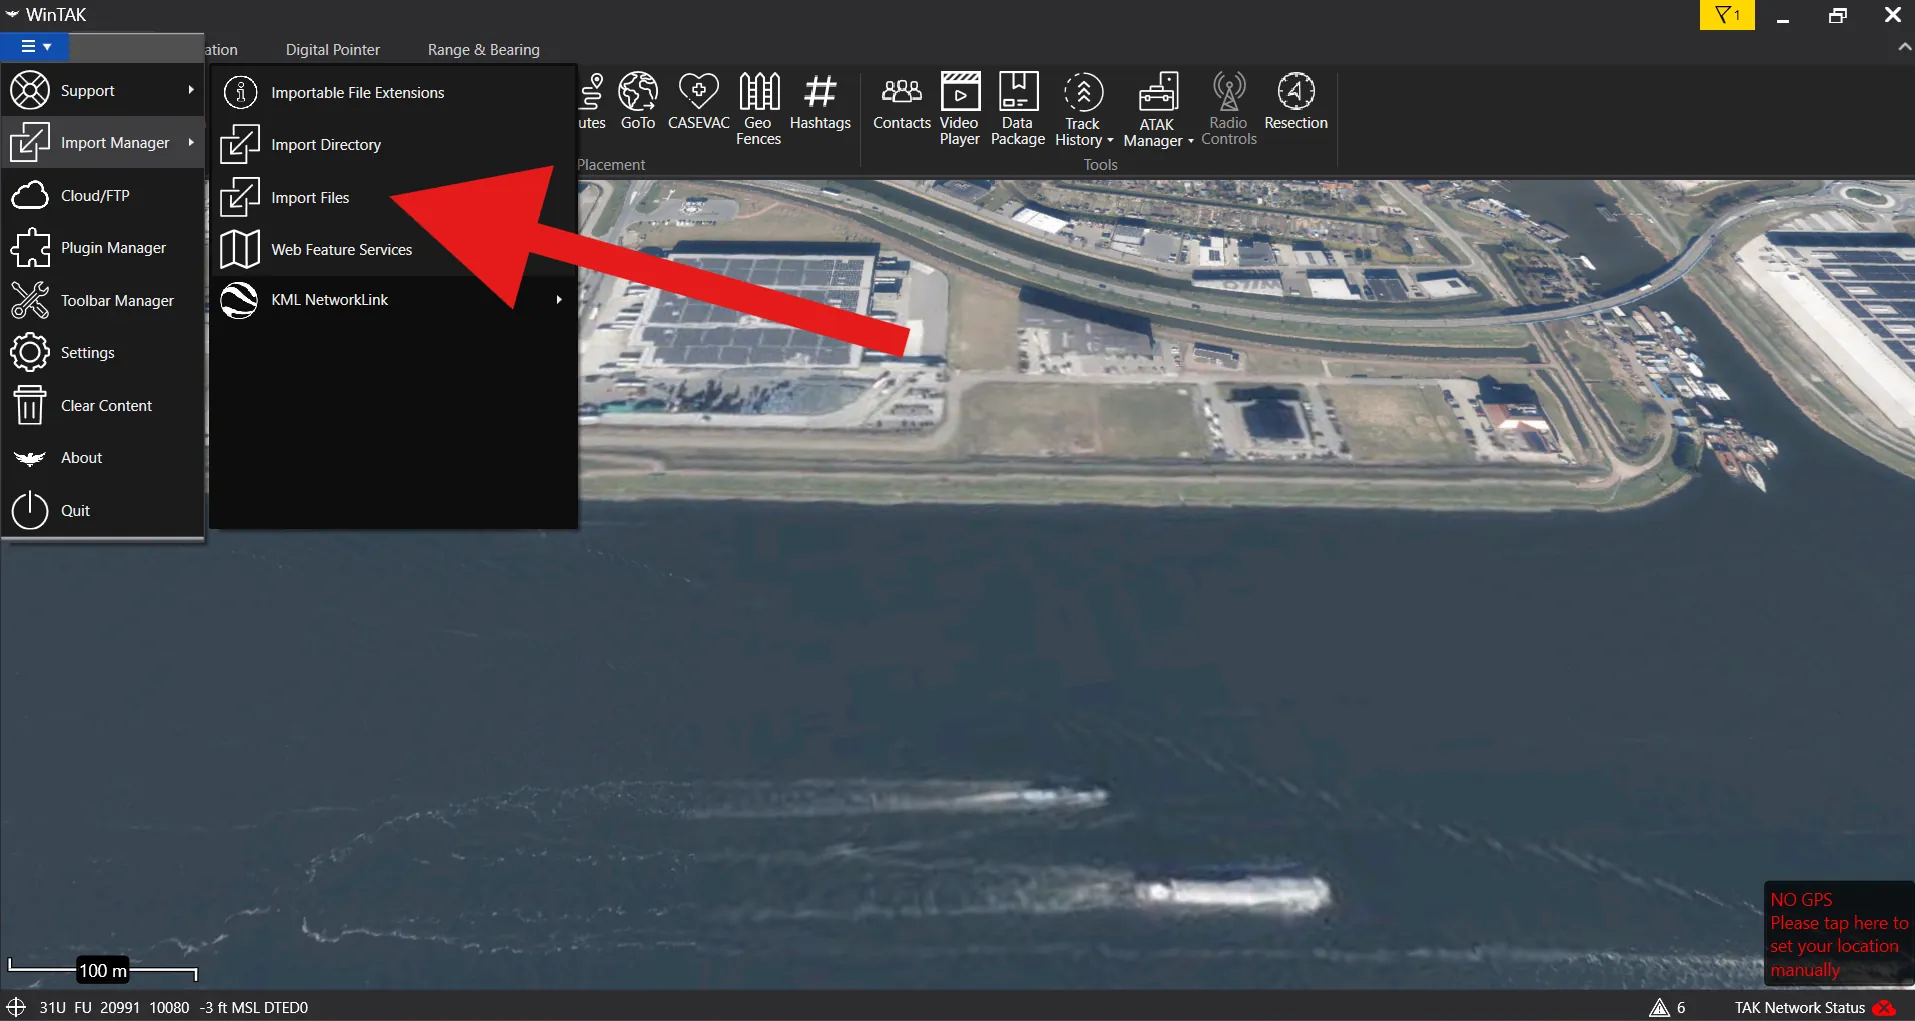
Open WinTAK and click the burger menu in the top-left corner.
Select Import Manager.

Click Import Files.
In Windows File Explorer, choose the downloaded setup ZIP file. Keep the ZIP intact - do not extract it before importing.
WinTAK will confirm that all files imported successfully and that the TAK server was added as a server connection.

Open the server connections list and confirm that the imported TAK server shows as connected.